Yamaha R1 Fairing Custom Builds

When you look at your Yamaha R1 Fairing, do you ever imagine a new style or color? Many riders love custom builds because they want their bike to stand out. You can choose from OEM, replica, or fully custom fairings. Think about what you want—maybe a race look or a bold color. Quality matters, so pick strong ABS plastic for lasting results. If you want a trusted kit, check out Nicefairings for great options.
Key Takeaways
Custom Yamaha R1 fairings let you change your bike’s look with colors, designs, and finishes that match your style.
Using lighter materials like ABS plastic improves your bike’s speed and handling by reducing weight and improving airflow.
You can choose from aftermarket kits, DIY projects, or professional builds based on your budget, skill, and desired finish.
Planning your build with clear goals, a budget, and the right materials helps you get the best results without surprises.
Taking care of fitment, maintenance, and legal rules keeps your custom fairings looking great and your bike street-legal.
Benefits
Aesthetics
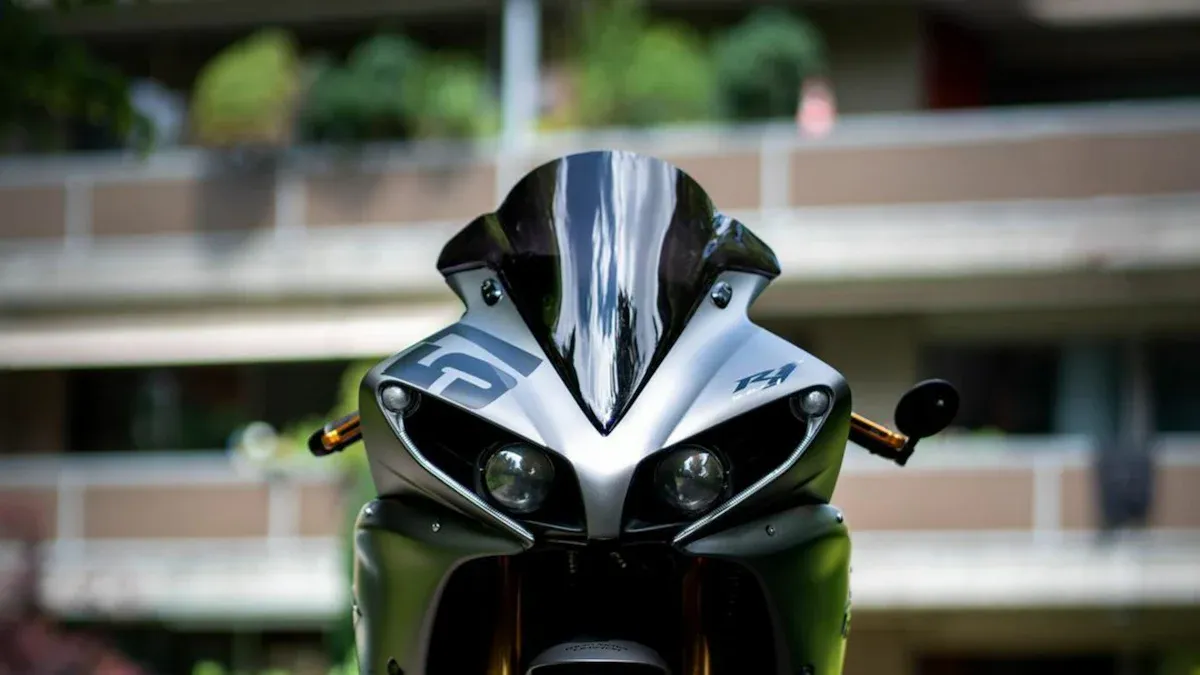
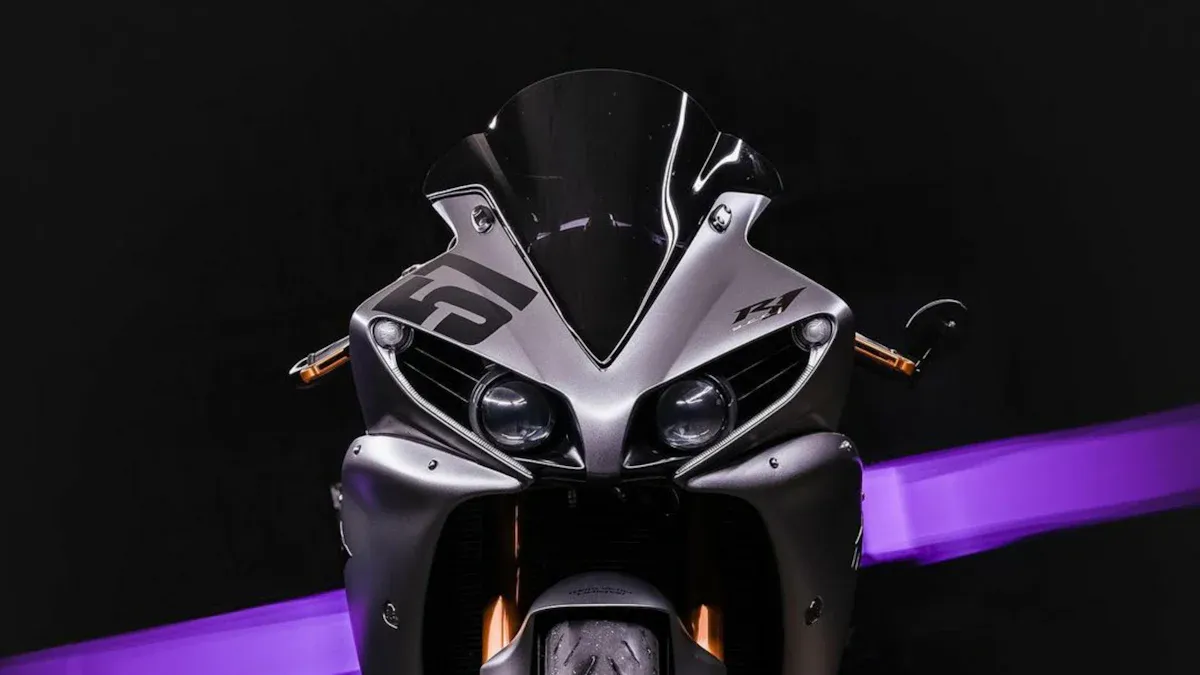
You want your bike to look amazing, right? Customizing your Yamaha R1 Fairing gives you the power to change its style. You can pick bold colors, cool graphics, or even a race-inspired design. Many riders love to match their fairings with their gear or helmet. Some go for a stealthy black look, while others choose bright, eye-catching colors.
Tip: If you want your bike to stand out at meets or on the street, a custom fairing is the way to go!
You can also choose different finishes, like glossy or matte. This small detail can make a big difference in how your bike looks.
Performance
Custom fairings do more than just look good. They can help your bike perform better. Lighter materials, like ABS plastic, can reduce the weight of your Yamaha R1. This means you get quicker acceleration and better handling. Some fairings have special shapes that help air flow smoothly over your bike. This can make your ride more stable at high speeds.
Lighter fairings = less weight
Better aerodynamics = smoother ride
You will notice the difference, especially if you ride fast or take your bike to the track.
Personalization
Your bike should show your personality. Custom fairings let you add your own touch. You can choose colors, patterns, and even add your name or number. Some riders like to show off their favorite brands or racing teams. Others want something totally unique.
You get to decide what your bike says about you. With so many options, you can make your Yamaha R1 Fairing one of a kind.
Yamaha R1 Fairing Options
When you start looking for Yamaha R1 Fairing options, you will see a lot of choices. You can pick from aftermarket kits, try your own DIY modifications, or go for professional builds. Each path has its own style, price, and level of effort. Let’s break down what you can expect.
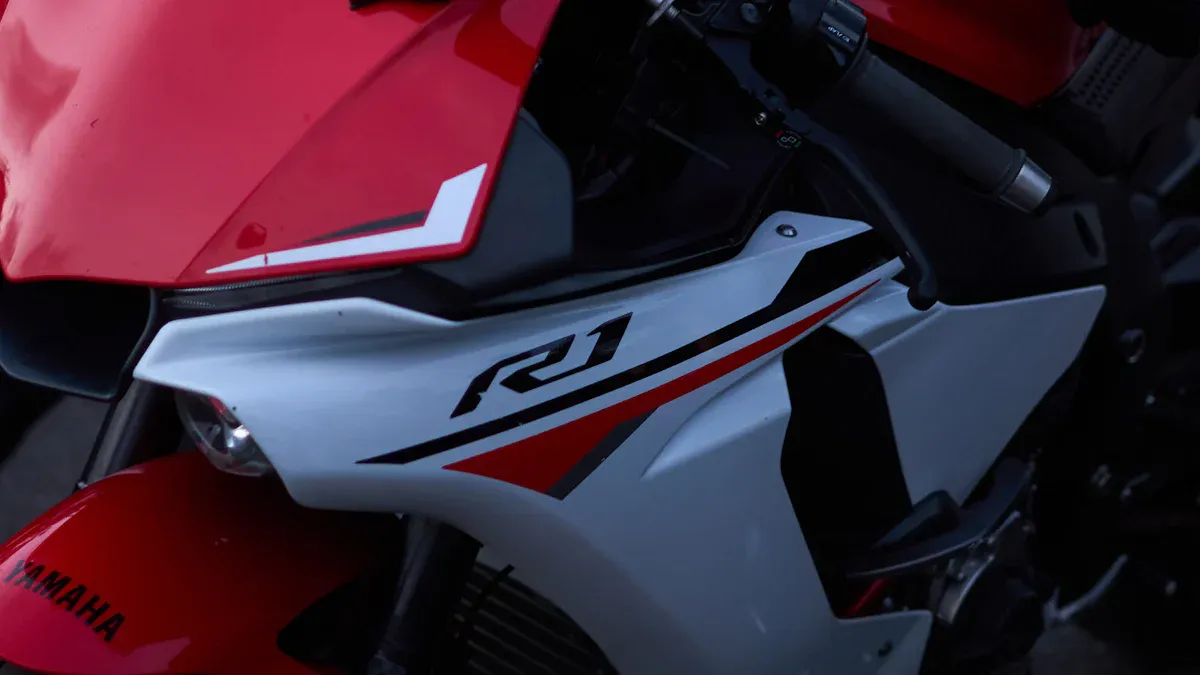
Aftermarket Kits
Aftermarket kits are a popular choice for many riders. You get a full set of fairings ready to install. These kits often use ABS injection molded plastic, which is strong and light. This material helps your bike stay tough while keeping the weight down. Most kits fit Yamaha R1 models from 1998 all the way to 2023, so you can find something for almost any year.
You will find a wide range of designs:
OEM styles that look just like the original
Race replica graphics for a sporty vibe
Custom colors and patterns to match your taste
Many kits come with all the pieces you need, like side panels, front and rear fairings, and even small trim parts. Paint quality matters, too. Good kits have smooth finishes and sharp graphics that last.
Here’s a quick look at the price range for aftermarket Yamaha R1 Fairing kits:
Model Year Range | Discounted Price (USD) | Original Price (USD) | Discount Percentage |
|---|---|---|---|
00-01 | 509.99 | 649.99 | 21% |
04-06 | 509.99 | 649.99 | 21%-22% |
07-08 | 519.99 | 659.99 | 22% |
09-11 | 519.99 | 659.99 | 21% |
12-14 | 519.99 | 659.99 | 22% |
15-19 | 509.99 | 649.99 | 22% |
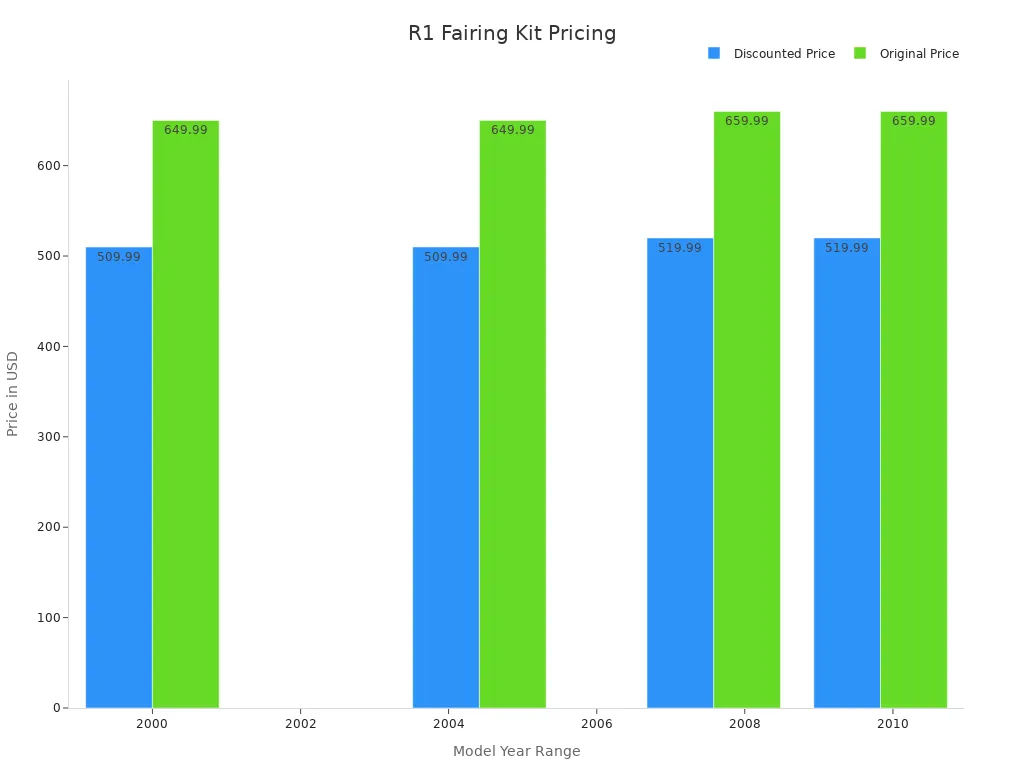
You can see that most kits cost between $510 and $520 after discounts. This makes them a smart pick if you want a fresh look without breaking the bank.
Tip: Nicefairings is a trusted brand for Yamaha R1 Fairing kits. They offer great fitment, strong ABS plastic, and sharp paintwork.
Pros:
Easy to install
Many designs and colors
Good value for the price
Cons:
Some kits may need small adjustments for perfect fit
Paint may not match factory colors exactly
DIY Modifications
If you like hands-on projects, DIY modifications might be your style. You can buy blank fairings and paint them yourself. Some riders add custom decals or stickers. Replica sticker sets and reproduction logo graphics are available for many Yamaha models. You can even find wheel stripes in lots of colors to match your bike’s look.
Here are some things you can try:
Custom paint jobs with spray cans or airbrush
Applying replica or custom decals
Adding wheel stripes for extra flair
DIY lets you control every detail. You can match your helmet, show off your favorite brand, or create a one-of-a-kind design. Many products are high quality and made under Yamaha license, so you get a great look at a good price.
Note: DIY projects take time and patience. You need to prep the surface, apply paint or decals carefully, and let everything dry fully.
Pros:
Total creative control
Lower cost if you do the work yourself
Unique results
Cons:
Takes time and skill
Mistakes can be hard to fix
May not look as polished as pro work
Professional Builds
Professional builds are the top choice if you want a flawless finish. You can work with a shop or custom builder to design your dream Yamaha R1 Fairing. They use high-end materials, expert paintwork, and perfect fitment. You can ask for anything—race replica, wild graphics, or even your own logo.
Professional builders often use ABS injection molded plastic for strength and durability. They make sure every piece fits just right. Paint quality is top-notch, with deep colors and smooth finishes.
If you want your Yamaha R1 to look like it rolled out of a race team garage, a pro build is the way to go.
Pros:
Best fit and finish
Custom designs with pro-level paint
No hassle for you
Cons:
Higher cost
Takes longer to complete
You need to find a trusted builder
No matter which option you choose, you can find something that fits your style and budget. Nicefairings stands out as a reliable source for Yamaha R1 Fairing kits, offering quality, value, and lots of design choices.
Planning
Setting Goals
Before you start your custom build, you need to set clear goals. Ask yourself what you want from your Yamaha R1 Fairing project. Do you want a new look, better performance, or both? Maybe you want your bike to match your favorite racing team. Some riders want a fairing that stands out at bike nights. Others just want to replace old or damaged parts. Write down your main goal. This step helps you stay focused and makes it easier to choose the right parts later.
Tip: Take a few photos of bikes you like. Use them as inspiration for your own build.
Choosing Materials
You have many choices when it comes to fairing materials. ABS plastic is the most popular. It is strong, light, and easy to paint. Some riders pick fiberglass or carbon fiber for a race-ready feel. Each material has its own look and price. ABS plastic works well for most street riders. Carbon fiber looks cool and feels light, but it costs more. Think about how you use your bike. If you ride every day, you want something tough and easy to clean.
Here’s a quick table to help you compare:
Material | Weight | Durability | Cost | Best For |
|---|---|---|---|---|
ABS Plastic | Light | High | $ | Daily riding |
Fiberglass | Medium | Medium | $ | Custom paint jobs |
Carbon Fiber | Very light | High | $ | Racing, show bikes |
Budgeting
You need a budget before you buy anything. Your budget will guide your choices and help you avoid overspending. Here are some tips that work well for custom Yamaha R1 Fairing projects:
Set a clear spending limit before you start.
Remember, higher quality fairings cost more.
Look at different materials and designs. These change the price a lot.
Save some money for tools or extra parts you might need.
Note: If you plan your budget early, you can get the best value for your money and avoid surprises later.
Custom Build Process
Removing Stock Fairings
First, you need to take off your old fairings. Start by parking your bike on a flat surface. Make sure it will not tip over. Use a screwdriver or Allen wrench to remove the bolts and screws. Keep these parts in a small container so you do not lose them. Some fairings have hidden clips, so check your manual if you get stuck. Take your time and do not force anything. If you rush, you might break a tab or scratch your Yamaha R1 Fairing.
Tip: Take photos as you go. These will help you remember where each piece fits later.
Prepping and Fitting
Now, get your new fairings ready. Lay out all the pieces and check for damage. Test-fit each part on your bike before you paint or wrap them. This step helps you spot any fitment issues early. If a piece does not line up, you can sand or adjust it. Make sure all holes match up with the mounting points. You want everything to fit snug and secure.
Double-check the fit of each panel.
Use masking tape to hold pieces in place if needed.
Painting or Wrapping
You can paint your fairings or use a vinyl wrap. Painting gives you more color choices and a smooth finish. Clean each piece with soap and water. Sand the surface lightly for better paint grip. Use primer, then spray on your color in thin layers. Let each layer dry before adding the next. If you choose a wrap, measure and cut the vinyl first. Use a heat gun to help the wrap stick to curves.
Note: Always work in a clean, dust-free area for the best results.
Assembly
Once your fairings look the way you want, it is time to put everything back together. Start with the main panels and work your way to the smaller pieces. Use the photos you took earlier as a guide. Tighten all bolts and screws, but do not overtighten. Check that nothing rubs against moving parts. Give your Yamaha R1 Fairing a final wipe-down to remove fingerprints or dust.
Take your time during assembly.
Make sure all parts are secure before riding.
Challenges and Maintenance
Fitment Issues
You might run into fitment problems when you install new fairings. Sometimes, aftermarket kits do not line up perfectly with your bike. You may notice gaps or panels that do not sit flush. If this happens, do not panic. Try test-fitting each piece before you paint or wrap it. Use a file or sandpaper to adjust tight spots. Always check that all mounting holes match up. If you get stuck, look for help from online forums or video guides. Many riders share tips and tricks that can save you time.
Durability
You want your fairings to last as long as possible. ABS plastic holds up well against bumps and weather. Still, you should check your fairings for cracks or loose bolts after long rides. If you spot a chip or scratch, fix it right away. Touch-up paint or clear nail polish can stop small chips from getting worse. Try not to drop your bike, as even strong fairings can crack under heavy impact.
Tip: Store your bike in a garage or use a cover to protect the paint from sun and rain.
Legal Considerations
Custom fairings look cool, but you need to follow the law. Some states have rules about lights, reflectors, or license plate placement. Make sure your new fairings do not block your turn signals or brake lights. If you ride on public roads, keep your bike street-legal. Check your local laws before you start your build. This step keeps you safe and avoids tickets.
Care Tips
Keeping your fairings clean helps them look new. Wash your bike with mild soap and water. Use a soft cloth to avoid scratches. Stay away from harsh chemicals that can damage the paint. Wax your fairings every few months for extra shine. If you use decals, press them down after each wash to keep the edges from peeling. Regular care makes your bike stand out and keeps your custom look fresh.
Inspiration
Community Builds
You are not alone in your custom build journey. Many riders love to share their projects and ideas. When you look at community builds, you see how much people help each other. Riders post photos, tips, and even step-by-step guides online. You can join forums or social media groups to ask questions and get advice.
One great example comes from the Superbike-Coach Corp Project Yamaha YZF-R1. This project brought together about 40 companies and over 2,500 students. Coach Can Akkaya noticed that his students’ bikes on the track and street all looked different. Their styles and choices inspired the project’s design. The team used ideas from the community to pick racing parts and create a unique look. You can see how sharing experiences and knowledge helps everyone build better bikes.
When you join a community, you get more than just advice. You find inspiration and support for your own custom build.
Unique Designs
You have endless options when it comes to custom designs. Some riders go for wild colors and bold graphics. Others like a clean, simple look. You might want to add your name, a favorite number, or a logo. Some people even match their bike’s style to their helmet or gear.
Here are a few ideas you might see in the community:
Race replica graphics for a sporty vibe 🏁
Matte black for a stealthy look
Neon colors that glow in the dark
Custom decals with your favorite brand
You can mix and match ideas to make your bike truly yours. If you want something no one else has, try sketching your own design or working with a pro painter. Remember, your bike is your canvas. Let your creativity shine!
You have everything you need to start your Yamaha R1 Fairing custom build. When you plan your project, pick quality materials, and follow each step, you get a bike that looks great and works even better. Custom fairings can boost airflow, protect your engine, and make every ride more comfortable. You also get to show off your style. Nicefairings offers kits with strong ABS plastic and a pro-level paint finish. Now is your chance to make your bike truly yours!
FAQ
How hard is it to install a Yamaha R1 fairing kit?
You can do it at home with basic tools. Most kits come with instructions. Take your time and keep track of screws. If you get stuck, check online videos or ask in forums.
Can I use custom fairings on the street?
Yes, you can use custom fairings on the street. Just make sure your lights, signals, and license plate stay visible. Always check your local laws before you ride.
What’s the best way to clean my custom fairings?
Use mild soap and water with a soft cloth. Avoid harsh chemicals. Dry your fairings with a microfiber towel. Wax them every few months for extra shine and protection.
Will aftermarket fairings affect my bike’s performance?
Aftermarket fairings made from ABS plastic are light and strong. You might notice better handling and a smoother ride. Some shapes help with airflow. Always check the fit for best results.
See Also
Unique Custom Motorcycle Fairings Crafted By Nicefairings
Nicefairings Offers Tailored Motorcycle Fairings For Riders
Top Quality Custom Fairings Designed For Honda CBR1000RR-R
Reasons Yamaha R6 Fairings Are Essential For Riders
Effortless Customization Of Personalized Motorcycle Fairings Designs
