How to Test Ride a Used Motorcycle Before Purchase

When buying a used motorcycle, taking it for a test ride is crucial. While a bike may appear visually appealing, hidden issues could be lurking beneath the surface. Problems caused by poor maintenance or improper storage might not be immediately visible. Riding the motorcycle allows you to evaluate its comfort and overall performance firsthand.
During the test ride, pay close attention to how smoothly the motorcycle idles. Test the brakes and clutch to ensure they function properly. Assess whether the bike feels stable at various speeds. These checks are essential to avoid potential issues and confirm the motorcycle is a good fit for you. This step is particularly important if you're buying a used motorcycle as your first bike. Skipping the test ride could result in costly mistakes, so make the most of this opportunity.
Key Takeaways
Always test ride a used motorcycle before buying it. This helps you find hidden problems and check comfort and performance.
Get ready for the test ride by bringing your license, safety gear, and tools. This shows you are serious and keeps you safe.
Inspect the motorcycle before riding. Look at the body, engine, tires, and electronics to find any issues.
Check how the motorcycle performs during the ride. Notice how it speeds up, stops, and handles to see if it fits you.
After riding, think about your experience. Write down what you liked and any worries to help decide.
Preparing for the Test Ride
Essential Items to Bring (License, Gear, and Tools)
Before heading out for a test ride, make sure you’re fully prepared. Start by bringing your motorcycle license. Sellers often require proof that you’re legally allowed to ride. Next, pack your safety gear, including a helmet, gloves, and sturdy footwear. These items not only protect you but also show the seller you’re serious about safety.
It’s also smart to carry a few basic tools. A flashlight can help you inspect hard-to-see areas, while a tire pressure gauge ensures the tires are in good shape. If you have a small multi-tool, it can come in handy for quick adjustments. Being prepared with these essentials sets the stage for a smooth and productive test ride.
Dressing for Safety and Comfort
What you wear during the test ride matters. Proper riding attire keeps you safe and comfortable. Here’s a quick breakdown of what to wear:
Safety Gear | Purpose |
|---|---|
Helmet | Protects your head in case of an accident |
Riding gloves | Enhances grip and protects hands from abrasions |
Sturdy jacket | Shields you from the elements and road rash |
Riding pants | Protects your legs |
Protective boots | Safeguards your feet and ankles |
Wearing the right gear not only protects you but also helps you focus on evaluating the bike instead of worrying about discomfort. Remember, safety first!
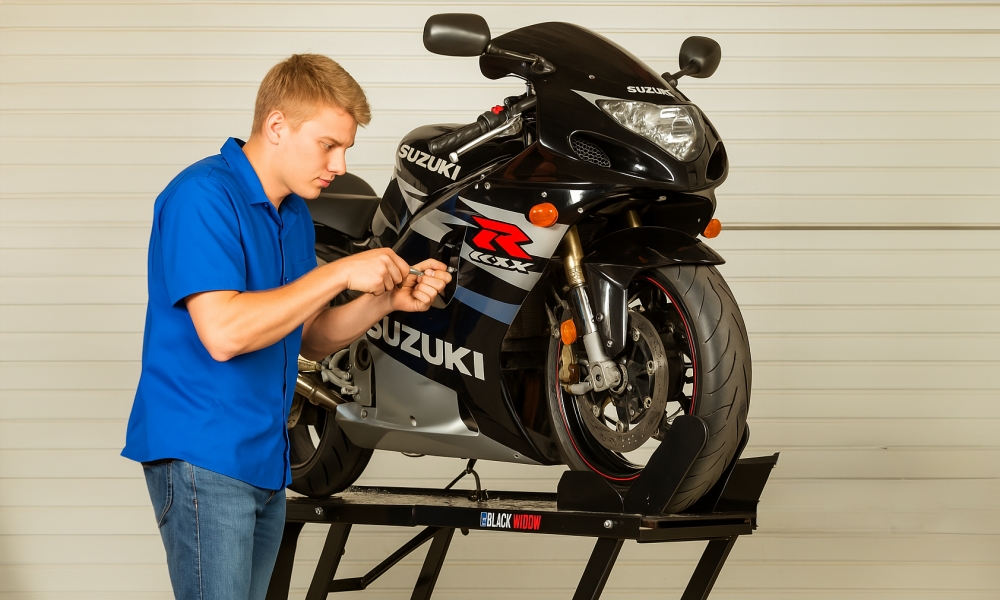
Pre-Ride Inspection Checklist for Buying a Used Motorcycle
Before you even start the engine, take a few minutes to inspect the motorcycle. This step-by-step guide will help you spot potential issues:
Examine the body: Look for dents, scratches, or rust. Check the seat for tears and ensure the paint is in good condition.
Inspect the engine: Make sure it’s cold before starting. Look for leaks, listen for unusual noises, and check the exhaust for damage.
Test the electronics: Turn on the lights, horn, and indicators. Verify that everything works as it should.
Check the tires: Inspect the tread depth and look for signs of dry rot or damage. Ensure the tires are matched in brand and type.
Review the suspension: Push down on the front and rear suspension to check for smooth movement and any signs of wear.
Here’s a helpful chart summarizing common inspection areas:
Taking the time to inspect these areas can save you from costly surprises later. A thorough pre-ride check ensures you’re ready to evaluate the bike’s performance during the test ride.
Safety Tips for Riding a Used Motorcycle
Gear Up for Safety
Your safety is the most important thing when riding. Before you ride, check that your gear is in good shape. A DOT-approved helmet is a must—it protects your head in accidents. Wear gloves with padding to protect your hands and improve grip. Sturdy boots that cover your ankles and a jacket with padding keep you safe from injuries.
Make sure your gear fits well and feels comfortable. Loose straps or a bad helmet fit can distract you while riding. If you borrow gear, check it for damage first. Being ready with proper gear keeps you safe and helps you focus on testing the motorcycle.
Be Respectful of the Seller’s Bike
Treat the seller’s motorcycle with care, like it’s your own. Always ask about their rules before riding. Some sellers may want you to avoid certain roads or keep the ride short. Following their rules shows respect and builds trust.
Check the bike for damage before riding to avoid confusion later. If you see anything wrong, tell the seller right away. Don’t ride recklessly or try stunts. The goal is to see how the bike performs, not to push it too hard.
Follow Legal and Insurance Rules
Before riding, make sure you meet all legal and insurance rules. Most sellers will ask to see your motorcycle license. Some might also want proof of insurance in case of an accident. If you don’t have insurance, ask if the seller’s policy covers test rides.
Sellers often take steps to protect themselves. For example:
As a seller, I require three things:
A deposit payment
A photo of their driver’s license
This is like what stores do before letting you test ride. It’s fair to ask buyers to sign a liability paper. (Check local laws to see if this is enforceable.)
Be ready to sign a waiver or leave a deposit. These steps protect both you and the seller. Knowing the rules ahead of time makes the test ride smooth and stress-free.
Used Bike Buying Checklist: What to Look for During the Test Ride
Evaluating Engine Performance and Noise
When test riding a used motorcycle, the engine's performance and noise are two of the most critical aspects to evaluate. Start by paying attention to how the engine responds when you accelerate. Does it feel smooth and powerful, or does it hesitate? A well-maintained engine should deliver consistent power without any hiccups. Here’s a quick checklist to guide you:
Acceleration: Test how quickly the bike picks up speed. A good benchmark is how fast it reaches 60 mph.
Top Speed: While you may not hit the maximum speed during a test ride, the bike should feel stable and capable at higher speeds.
Horsepower and Torque: These influence how the bike performs at both low and high speeds. A lack of torque can make the bike feel sluggish.
Fuel Efficiency: While harder to gauge on a short ride, ask the seller about the bike’s mileage.
Braking Distance: Test how quickly the bike comes to a stop when you apply the brakes.
Noise is another key indicator of engine health. Listen for unusual sounds like knocking, rattling, or excessive vibration. Typical motorcycle noise levels range from 80 dBA to 97 dBA, with most falling around 90 dBA. If the engine sounds unusually loud or harsh, it could indicate wear and tear. For example, studies show that a 250 cc motorcycle’s noise level can increase significantly after several hundred miles of use. This highlights the importance of checking for changes in noise that might signal underlying issues.
Testing Brakes, Suspension, and Handling
The brakes, suspension, and handling determine how safe and enjoyable the motorcycle is to ride. Start by testing the brakes. Gradually apply both the front and rear brakes to see how the bike responds. Does it stop smoothly, or does it jerk? A good braking system should feel firm and responsive without any squealing or grinding noises.
Next, evaluate the suspension. Ride over a few bumps or uneven surfaces to see how the bike absorbs shocks. Push down on the handlebars and seat when stationary to check for smooth movement. If the suspension feels stiff or bouncy, it might need repairs.
Finally, assess the bike’s handling. Take it through a few turns to see how it leans and responds. A well-balanced motorcycle should feel stable and predictable, even at low speeds. Pay attention to the weight-to-power ratio as well. A lighter bike with good power will handle better in most situations. If you’re unsure how to check for crash damage, look for signs like misaligned handlebars or uneven tire wear, which can affect handling.
Assessing Comfort and Ergonomics
Comfort is just as important as performance when buying a used motorcycle. After all, you’ll spend a lot of time in the saddle. Start by sitting on the bike to see how it feels. Are the handlebars, seat, and footpegs positioned comfortably? A good fit should allow you to reach everything without straining.
During the ride, pay attention to how the seat feels. Studies show that seating comfort is influenced by static factors, especially when vibration levels are low. If the seat feels too hard or the vibrations are excessive, it could make long rides uncomfortable.
Ergonomics also play a big role. A bike with poor ergonomics can lead to fatigue or discomfort, especially on longer rides. Make sure the controls are easy to reach and operate. If the bike feels awkward or cramped, it might not be the right fit for you.
By following this used bike buying checklist, you’ll be able to evaluate the motorcycle’s engine, brakes, suspension, and overall comfort. This ensures you’re making an informed decision and getting a bike that suits your needs.
Checking Electrical Components and Controls
When testing a used motorcycle, don’t forget the electrical components and controls. These parts are important for safety and how the bike works. A quick check can help you avoid costly repairs later. Here’s how to inspect them step by step.
Start with the Battery
The battery powers the bike’s electrical system. Look for leaks, rust, or damage on it. Rusty terminals or loose wires can make starting hard. Make sure the terminals are clean and tightly connected. If the battery looks old, it may need replacing soon.
Test the Lights and Indicators
Lights help you see and stay safe. Turn on the headlights and check both high and low beams. Do they work well? Test the turn signals, brake lights, and tail lights too. Walk around the bike to ensure all lights are working and not cracked. Broken lights can be a big problem, especially for night rides.
Inspect the Instrument Panel
The instrument panel shows important info while riding. Check if the speedometer, odometer, and fuel gauge work correctly. Are they easy to read? If warning lights are on, ask the seller why. A broken panel might mean bigger electrical problems.
Examine the Wiring Harness
Look closely at the wiring harness. Worn or exposed wires can cause electrical issues. Check that all wires are secure and not damaged. Watch for spots where wires rub against the frame, as this can wear them out. Good wiring keeps the bike running smoothly.
Check the Fuse Box
The fuse box stops the electrical system from overloading. Open it and look at the fuses. Are any blown or in bad shape? Replacing a fuse is easy, but frequent problems could mean bigger issues. Ask the seller if they’ve had electrical troubles before.
Test the Switches and Controls
Try all the switches and controls. Turn the ignition switch, honk the horn, and press the starter button. Do they work well? Test the kill switch, clutch, and brake levers too. If anything feels sticky or doesn’t respond, it might need fixing.
Pro Tip: Planning to upgrade your bike? Make sure the electrical system is in great shape first. Brands like Nicefairings can help you customize your motorcycle, but a strong electrical system is key for upgrades.
By checking the electrical components and controls, you’ll feel more confident about the bike’s condition. A good system makes riding safer and smoother. Don’t skip this step—it’s worth your time!
Post-Ride Evaluation for Buying a Used Motorcycle
Reviewing Your Test Ride Experience
After the test ride, think about how the bike felt. Did it meet what you were hoping for? Consider its performance, comfort, and handling. Was the engine quick to respond when you sped up? Did the brakes work smoothly and feel reliable? These are important things to check.
Notice how the bike handled turns and different speeds. If it felt wobbly or hard to control, it might not be the right choice. Comfort matters too. Did the seat and handlebars feel good, or were you adjusting a lot? A motorcycle should feel easy to handle, not like a struggle.
Write down what you liked and didn’t like about the ride. This will help you compare it to other bikes you might test later. If something seemed wrong, don’t ignore it—it could mean a bigger problem.
Identifying Red Flags or Warning Signs
Finding warning signs can stop you from buying a bad bike. Check for signs of accidents, like mismatched paint or dents. These could affect how the bike works and its safety.
Mechanical problems often show up during the ride. Listen for strange sounds like rattling or knocking. After parking, check for leaks under the bike. Odd smells, like burning oil, can also mean trouble. High mileage isn’t always bad, but check for wear on the engine and suspension.
Ask the seller for maintenance records. If they don’t have them or seem unsure, it might mean the bike wasn’t cared for well. If the seller won’t let you get the bike inspected, that’s a warning sign. A good seller should allow a mechanic to check it.
Also, carefully review the paperwork. Make sure the title is clear and has no problems. If you’re worried about theft, check the VIN and title history for any issues. These steps help you avoid mistakes and ensure the bike is legal.
Asking the Seller Follow-Up Questions
After checking the bike, ask the seller more questions. This can give you extra details you might not notice right away. Start by asking why they’re selling the bike. Their answer can tell you more about its condition and history.
Ask about any problems they know of. Sellers might share issues they didn’t mention before. For example, you could ask, “Have you had any repeated problems with the bike?” Open-ended questions like this often get honest answers.
Learn more about the bike’s maintenance. Ask when it was last serviced and if any big repairs were done. If the seller mentions ongoing problems, you’ll know what to watch for.
Here’s a list of questions to ask:
Why are you selling the bike?
Has it been in any accidents or had repairs?
Are there any problems with it?
When was it last serviced?
Is the title clear and ready to transfer?
These questions help you decide wisely and build trust with the seller. A good talk can make the buying process easier and give you confidence in your choice.
Making an Informed Decision to Buy a Used Motorcycle
Now that you’ve completed the test ride and post-ride evaluation, it’s time to decide if this motorcycle is the right one for you. This step is all about weighing what you’ve learned and making a choice you’ll feel good about. Let’s break it down into simple steps to help you make a confident decision.
Compare What You Found with Your Needs
Start by asking yourself: Does this bike meet your expectations? Think about the key areas you evaluated—engine performance, comfort, handling, and safety. If the motorcycle checked most of your boxes, that’s a great sign. But if you noticed issues that don’t align with your needs, it might be worth reconsidering. For example:
Performance: Did the engine respond smoothly, or did it struggle?
Comfort: Could you see yourself riding this bike for long trips, or did it feel awkward?
Safety: Were the brakes and suspension reliable, or did they seem worn out?
Write down the pros and cons of the bike. Seeing everything laid out can make your decision clearer. If you’re comparing multiple motorcycles, this list will help you spot which one stands out.
Use a Decision-Making Framework
Sometimes, deciding isn’t as simple as listing pros and cons. That’s where decision-making frameworks can help. These tools are designed to handle uncertainty and give you a structured way to evaluate your options. Here’s a quick look at some frameworks you can use:
Framework Type | Description |
|---|---|
Handles ambiguity and uncertainty in evaluations, offering a balanced view. | |
Hypersoft Sets | Helps manage vagueness when you’re unsure about certain aspects. |
Neutrosophic Sets | Addresses uncertainty but may not adapt as well as svNCHSS. |
If you’re feeling stuck, try using the svNCHSS framework. It’s especially useful when you’re dealing with mixed feelings about the bike. For instance, if the engine performed well but the suspension felt off, this framework can help you weigh those factors more effectively.
Consider the Costs Beyond the Price Tag
The sticker price isn’t the only cost to think about. Ask yourself if the bike will need repairs or upgrades soon. For example, if the tires are worn or the battery looks old, you’ll need to budget for replacements. Maintenance history can also give you clues about future expenses. A well-maintained bike might cost more upfront but save you money in the long run.
Here’s a quick checklist of potential costs to consider:
Immediate Repairs: Tires, brakes, or suspension issues.
Upgrades: New lights, fairings, or other customizations.
Insurance: Check how much it will cost to insure this specific model.
Fuel Efficiency: A bike with poor mileage could cost more over time.
By factoring in these costs, you’ll get a clearer picture of whether the bike fits your budget.
Trust Your Gut (But Back It Up with Facts)
Sometimes, your instincts can tell you a lot. If something feels off about the bike or the seller, trust that feeling. But don’t rely on gut feelings alone. Back them up with the facts you’ve gathered. For example, if the bike felt unstable during the test ride, check your notes to see if the suspension or tires showed signs of wear.
On the flip side, if the bike felt perfect and the seller seemed trustworthy, that’s a good sign you’re on the right track. Just make sure everything checks out—like the title, VIN, and maintenance records—before you commit.
Pro Tip: If you’re still unsure, consider bringing a trusted mechanic or experienced rider to inspect the bike. A second opinion can give you extra confidence in your decision.
Make Your Offer (or Walk Away)
If everything looks good and you’re ready to move forward, it’s time to make an offer. Be polite but firm. Use what you’ve learned during the inspection and test ride to negotiate a fair price. For example, if the bike needs new tires, you can ask for a discount to cover that cost.
If the seller isn’t willing to negotiate or you’re not fully convinced, don’t be afraid to walk away. There are plenty of motorcycles out there, and it’s better to wait for the right one than to settle for a bike that doesn’t feel right.
By following these steps, you’ll be able to make an informed decision that you won’t regret. Whether you end up buying this motorcycle or continuing your search, you’ll know you’ve done your homework and made the best choice for your needs. Happy riding! 🏍️
Test riding a used motorcycle is one of the most important steps in the buying process. It’s your chance to uncover hidden issues and see if the bike truly fits your needs. During the ride, feel how the bike handles, listen for unusual engine sounds, and test the brakes and suspension. These checks can save you from costly mistakes later.
By following the steps in this guide, you’ll approach the process with confidence. A thorough test ride ensures the motorcycle is in good condition and aligns with your expectations. Remember, the used bike buying checklist isn’t complete without this critical step. Take your time, trust your instincts, and make a choice you’ll feel great about.
FAQ
What should I do if the seller doesn’t allow a test ride?
Ask for a detailed video showing the bike’s performance. Request a mechanic’s inspection or offer to leave a deposit. Sellers often agree when you show genuine interest and responsibility.
How long should a test ride last?
Aim for 15–20 minutes. This gives you enough time to test the engine, brakes, suspension, and handling. If the seller allows, ride on different road types to evaluate the bike’s performance.
Can I test ride a motorcycle without insurance?
Some sellers may allow it, but it’s risky. If you damage the bike, you could be liable for repairs. Always check with the seller and consider temporary insurance for peace of mind.
What if I find issues during the test ride?
Point them out to the seller immediately. Ask if they’re willing to fix the problems or adjust the price. If the issues seem serious, consider walking away from the deal.
Should I bring someone with me for the test ride?
Yes, if possible. A mechanic or experienced rider can spot issues you might miss. They can also provide a second opinion, helping you make a more informed decision.
See Also
Tips for Ensuring Safety During Your Initial Motorcycle Journey
Key Advice for Crafting Your Ideal Motorcycle Experience
Steps to Prepare Your Motorcycle for Winter Weather
Top Six Stylish Motorcycles for New Riders This Year
Comprehensive Analysis of Kawasaki Ninja 650's Performance Features
