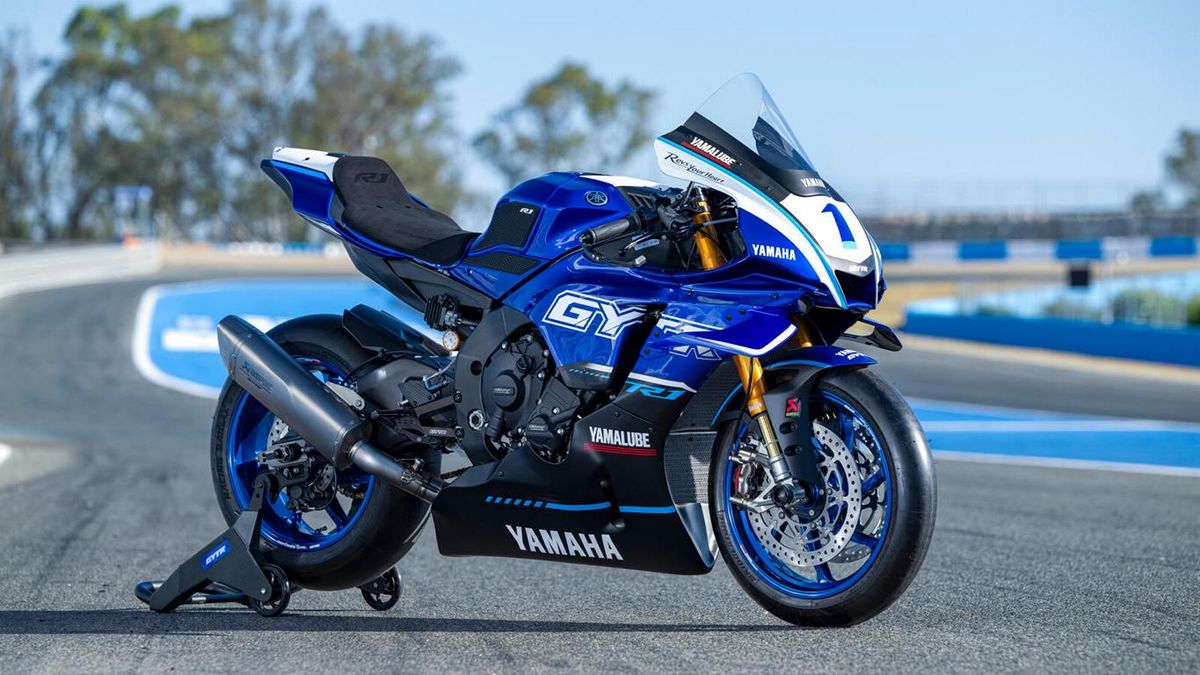
Sportbike Maintenance Essentials for Safe Riding


Taking care of your motorcycle isn’t just about looks—it’s about staying safe. Skipping regular maintenance can cause big problems. Did you know brake issues cause 42% of crashes from mechanical problems? Tire blowouts make up another 22.4%. A quick check before riding season can prevent these dangers. Old tires or bad brakes don’t just cost money; they can be very dangerous. Following a Sportbike Maintenance Checklist keeps your bike running well and makes every ride safer and more fun.
Key Takeaways
Regular upkeep is important for safety. Inspect brakes and tires to avoid crashes.
Do a check before riding. Spot any damage, test lights, and make sure parts are tight.
Keep fluids full. Check oil, coolant, and brake fluid often for best performance.
Pre-Ride Inspection Checklist
Before you hit the road, taking a few minutes to go through a pre-ride inspection can make all the difference. It’s not just about keeping your bike in top shape—it’s about your safety. A quick check can help you spot small issues before they turn into big problems. Let’s dive into the essentials.
Visual check for damage or loose components
Start by giving your sportbike a good once-over. Look for anything that seems out of place. Are there any cracks, dents, or scratches on the body? These might not seem like a big deal, but they could point to underlying issues. Pay close attention to areas like the handlebars, footpegs, and mirrors. Loose components can rattle while you ride, which isn’t just annoying—it’s dangerous.
Don’t forget to check the bolts and fasteners. A quick twist with your fingers or a wrench can confirm if they’re secure. If something feels loose, tighten it up. This step is simple but crucial. It’s all about catching potential problems early. Incorporating this into your routine helps keep your motorcycle in optimal condition and reduces risks.
Tip: Keep a small toolkit handy for these quick fixes. It’s a lifesaver when you’re on the go.
Ensure all lights and signals are functioning
Your lights and signals are your communication tools on the road. They let other drivers know what you’re doing, whether you’re turning, stopping, or just cruising. Before every ride, check that all your lights are working properly. This includes the headlights, brake lights, and turn signals.
Turn on your bike and test each light one by one. Is the headlight bright enough? Does the brake light respond when you press the lever? Are the turn signals blinking at the right speed? If any of these aren’t working, replace the bulbs or check the wiring. Riding without functioning lights isn’t just risky—it’s illegal in many places.
Note: If you’re riding at night, double-check your high beams. They’re essential for better visibility in low-light conditions.
By making these steps part of your sportbike maintenance checklist, you’re not just protecting your bike—you’re protecting yourself. A thorough pre-ride inspection ensures your motorcycle is ready for the road, giving you peace of mind and a safer ride.
Fluid Checks and Replacements
Checking your motorcycle’s fluids is super important. Skipping this can hurt your bike or make it run badly. Here’s how to keep things in good shape.
Engine oil level and condition
Engine oil helps your bike run smoothly and stay cool. Before riding, check the oil level with the dipstick or sight glass. If it’s low, add more oil. Look at the oil’s color and feel. Clean oil is golden or light brown. Dirty oil is dark and rough. Change it if it’s dirty.
Tip: Follow the maker’s rules for oil type and when to change it. This keeps your bike working well.
Coolant level and quality
Coolant stops your engine from getting too hot. Check the coolant tank to see if the level is between the marks. If it’s low, refill it with the right coolant. Look at the color too. Coolant should be green, orange, or pink. If it’s rusty or cloudy, flush it out and replace it.
Note: Using the wrong coolant can damage your engine. Always check the type before adding more.
Brake fluid inspection
Brake fluid helps your bike stop safely. Open the brake fluid tank and check the level. It should be between the lines. If it’s low, add the right fluid from your manual. Look at the color. Fresh fluid is clear or light yellow. Old fluid is dark. Replace it if needed.
Reminder: Brake fluid absorbs water over time, which can make brakes weaker. Check it often.
Adding fluid checks to your maintenance list keeps your bike safe and smooth. These easy steps help avoid big problems and costly fixes.
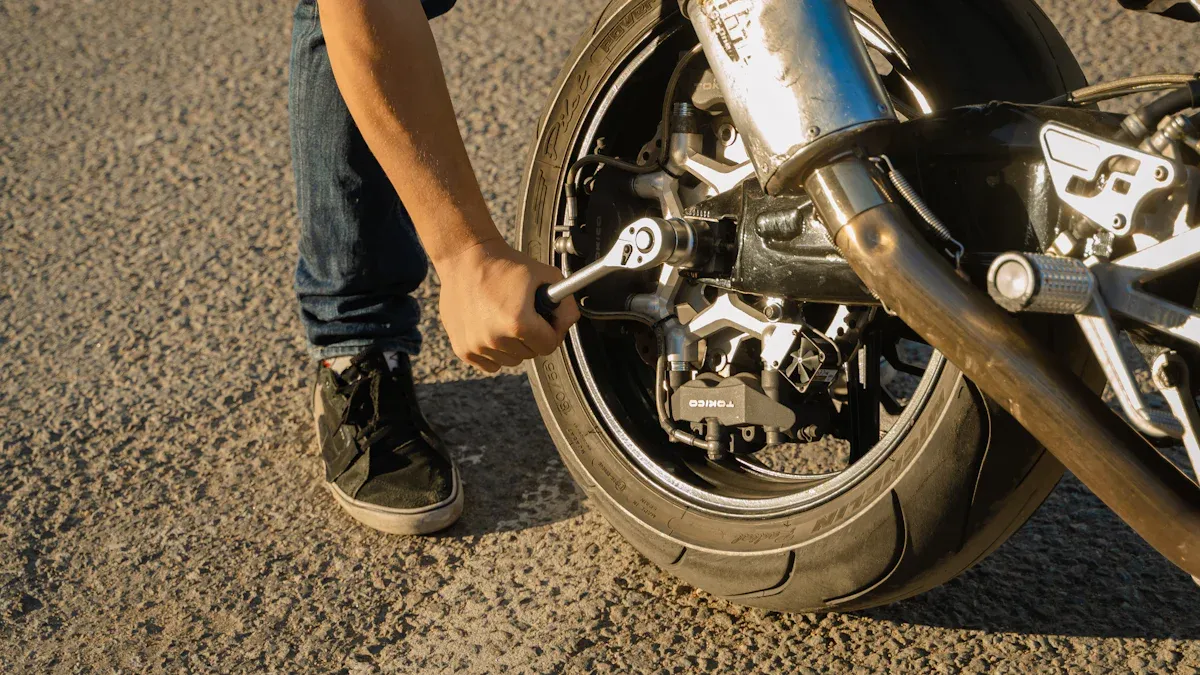
Brake System Maintenance
Your brakes are super important for staying safe on the road. Keeping them in good condition helps you stop quickly when needed. Checking and fixing your brake system often can prevent accidents. Let’s go over the steps.
Look at brake pads for wear
Brake pads do most of the work when stopping your bike. Over time, they wear out and stop working well. Check them by looking through the caliper window or taking off the caliper. If the pads are thin—less than 3mm—they need replacing. Worn pads can harm your rotors, which costs more to fix.
Tip: If you hear squealing or grinding when braking, replace the pads soon.
Check brake rotors for problems
Brake rotors work with the pads to slow your bike. Look for cracks, warping, or deep scratches. Gently run your fingers over the surface (when cool) to feel for uneven spots. Damaged rotors make braking weaker and unsafe. Replace them if you find any issues.
Here’s a simple table about safety rules for brakes:
Rule | What It Covers |
|---|---|
Rules for safe motorcycle brakes, including anti-lock braking systems (ABS). | |
Technical Updates | Changes to keep brake rules up-to-date with safety standards. |
Test how the brake lever feels
A good brake lever is key for safe riding. Squeeze it to check if it feels firm. If it feels soft or squishy, there might be air in the brake lines, or the fluid could be low. Test both front and back brakes to make sure they work well. Fix any problems before riding again.
Reminder: Checking your brake system often keeps your bike safe and ready for the road.
Air Filter Cleaning or Replacement
The air filter in your motorcycle helps keep the engine healthy. It allows clean air to flow in, which is key for smooth riding. Ignoring this small part can cause big problems. Let’s learn how to spot a dirty air filter and fix it.
Signs of a dirty or clogged air filter
A clogged air filter can cause noticeable issues. Look out for these signs:
Your bike feels weak and struggles to climb hills.
It’s hard to speed up because the engine lacks air.
The engine sounds uneven when idling, like it’s unstable.
Here’s a table showing how a dirty air filter affects your bike:
Problem | What Happens |
|---|---|
Less Airflow | A dirty filter blocks air, causing poor engine performance. |
Trouble Accelerating | Not enough air makes it hard for the bike to speed up. |
Uneven Idling | Dirty air leads to rough and unstable engine idling. |
If you notice these problems, check your air filter right away.
Steps to clean or replace the air filter
Taking care of your air filter is simple. Follow these steps:
Find the air filter housing under the seat or near the engine.
Take out the filter and check for dirt or damage.
If reusable, clean it with air filter cleaner and let it dry.
For paper filters, replace them if they’re dirty or torn.
Put the filter back and make sure the housing is sealed tightly.
Did you know a K&N filter lets in 50% more air than a paper one? Even after 50,000 miles, it keeps 60% of its airflow. Regular care like this keeps your bike running well and avoids problems.
Tip: Check your air filter every 5,000 to 10,000 miles. If you ride in dusty areas, check it more often.
Keeping your air filter clean or replacing it when needed protects your engine. It also makes your rides smoother and more enjoyable.
Battery Maintenance Checklist
Taking care of your motorcycle's battery is important for smooth rides. A good battery helps your bike start easily and powers its electrical parts. Here are two simple ways to keep your battery working well.
Look for corrosion on battery terminals
Check the battery terminals for any buildup. Corrosion looks like white or green powder. This can block electricity and make starting your bike harder. If you see it, clean it with baking soda and water. Use a small brush to scrub gently, then dry the area with a cloth.
Tip: After cleaning, spread a little petroleum jelly on the terminals. This stops corrosion and keeps the connections strong.
Cleaning the terminals often helps your battery last longer.
Measure battery charge and voltage
Testing your battery’s charge is also important. Use a multimeter to check the voltage. A fully charged battery should show about 12.7 volts. If it’s below 12.0 volts, recharge or replace the battery.
Here’s a simple table to explain voltage and charge levels:
Charge Level | Gravity Reading | Voltage |
|---|---|---|
Full | 1.265 | 12.7 |
75% | 1.225 | 12.4 |
Half | 1.190 | 12.2 |
Low | 1.155 | 12.0 |
Empty | 1.120 | 11.9 |
For a visual guide, check this chart:
If your battery often shows low voltage, it may need replacing. A strong battery keeps your bike running well and avoids problems.
By following these tips, your battery will stay in great shape for safe and fun rides.
Tire Inspection Checklist
Your motorcycle’s tires are what touch the road. Keeping them in good shape is very important for safety and performance. Checking your tires often can stop accidents, save money, and make them last longer. Here’s how to make sure your tires are ready to ride.
Check tire pressure
Tire pressure affects how your motorcycle handles. Low pressure makes steering harder and can cause blowouts. High pressure reduces grip and makes riding bumpy.
Use a tire gauge to check the pressure before riding. Compare it to the number in your owner’s manual. Fix it if it’s too high or low. Correct pressure keeps you safe and saves money. Did you know proper tire pressure can save fuel costs?
Tip: Check pressure when tires are cold. Warm tires give wrong readings.
Inspect tread depth and wear
Tread depth helps your motorcycle grip wet or slippery roads. Worn treads make stopping harder and less safe. Use a penny or tread gauge to check. Put the penny in the tread with Lincoln’s head down. If you see his head, replace the tire.
Replace tires when tread depth is 2/32 of an inch. Checking tread also shows uneven wear, which may mean alignment problems. Good tire care can make tires last longer, up to 4,700 miles more.
Fact/Statistic | What It Means |
|---|---|
Shows how unsafe bad tire care can be | |
Correct pressure saves fuel costs | Shows money-saving benefits of proper tire care |
Only 19% of people inflate tires correctly | Highlights how common underinflation is |
Proper inflation adds 4,700 miles to tire life | Shows how tire care extends tire use |
Replace tires at 2/32-inch tread depth | Stresses tread depth’s role in safety |
Look for cracks or punctures
Cracks and punctures weaken tires and can cause sudden problems. Check the sides and tread for damage. Cracks from sunlight or age can grow bigger. Punctures from nails or sharp objects might not deflate the tire right away but can get worse.
If you find a puncture, see if it can be fixed. Small holes in the tread can often be patched. Sidewall damage usually means you need a new tire. Riding on damaged tires is dangerous, so don’t ignore these signs.
Reminder: Checking for cracks and punctures often keeps your tires safe and avoids surprises on the road.
Following this checklist keeps your motorcycle safe and working well. A few minutes of care can make your rides better and safer.
Cable Checks and Maintenance
Cables are like the unsung heroes of your motorcycle. They connect you to the machine, making sure every twist of the throttle and pull of the clutch works smoothly. Neglecting them can lead to frustrating or even dangerous situations. Let’s go over how to keep them in top shape.
Inspect throttle and clutch cables for fraying
Start by taking a close look at your throttle and clutch cables. Frayed cables are a big red flag. They can snap unexpectedly, leaving you stranded or unable to control your bike. Check the entire length of each cable, especially near the ends where they attach to the levers or throttle housing. Look for broken strands, rust, or any signs of wear.
If you spot fraying, don’t wait—replace the cable immediately. Riding with damaged cables isn’t just risky; it can also cause more damage to your motorcycle’s components. A quick inspection before every ride can save you from a lot of trouble.
Tip: Keep a spare throttle and clutch cable in your toolkit. You’ll thank yourself if one ever breaks on the road.
Ensure cables are properly lubricated
Lubrication is key to keeping your cables working smoothly. Dry or sticky cables can make the throttle feel stiff or the clutch harder to pull. Use a cable lubricant designed for motorcycles and apply it along the length of each cable. A cable oiler tool can make this job easier and less messy.
Well-lubricated cables reduce friction, making your controls feel light and responsive. Plus, it helps extend the life of the cables. Make this a regular part of your maintenance routine, especially if you ride in dusty or wet conditions.
Reminder: Avoid over-lubricating. Excess oil can attract dirt, which defeats the purpose of cleaning and lubricating.
Taking care of your cables ensures a smoother, safer ride. It’s a small effort that makes a big difference in how your motorcycle performs.
Chain Cleaning and Lubrication
Your motorcycle’s chain is one of its hardest-working parts. It transfers power from the engine to the rear wheel, so keeping it in top shape is essential. A clean and well-lubricated chain not only improves performance but also extends its lifespan. Let’s break down how to inspect and maintain it.
Inspect chain tension and alignment
Start by checking the chain’s tension. A chain that’s too tight can strain the sprockets and bearings, while a loose chain can slip off during a ride. Use your owner’s manual to find the recommended slack measurement. Typically, you’ll want about 1 to 1.5 inches of slack when you press the chain midway between the sprockets.
Next, check the alignment. Misaligned chains wear unevenly and can cause handling issues. Look at the alignment marks on the swingarm to ensure the rear wheel is straight. If the chain looks off, adjust it using the axle adjusters.
Tip: Always recheck the tension after adjusting the alignment. Small changes can affect the slack.
Steps to clean and lubricate the chain
Cleaning your chain is simple. Here’s how:
Place your motorcycle on a stand to lift the rear wheel.
Use a chain cleaner or kerosene and a soft brush to scrub off dirt and grime.
Wipe the chain dry with a clean cloth.
Once it’s clean, apply a motorcycle-specific chain lubricant. Spray evenly while rotating the rear wheel to cover all sides. Let it sit for a few minutes to penetrate, then wipe off any excess to prevent dirt buildup.
Reminder: Clean and lube your chain every 300-600 miles or after riding in wet or dirty conditions.
Taking care of your chain ensures smoother rides and fewer breakdowns. It’s a small effort with big rewards.
General Cleaning and Maintenance
Importance of keeping your sportbike clean
Keeping your motorcycle clean isn’t just about making it look good. It’s about protecting it from wear and tear. Dirt, grime, and road debris can build up over time, causing rust and damaging parts. A clean bike runs better and lasts longer. Plus, regular cleaning gives you a chance to spot small issues before they turn into costly repairs.
Think of cleaning as part of your maintenance routine. It’s like giving your bike a health check. For example, wiping down the body can reveal scratches or cracks. Cleaning the wheels might help you notice a nail in the tire. These small steps can save you from bigger problems later.
Here’s a quick look at how regular maintenance tasks contribute to your bike’s longevity:
Maintenance Task | Benefit for Longevity |
|---|---|
Oil Changes | Prevents engine wear and maintains performance |
Brake Checks | Ensures safety and prevents accidents |
Fluid Inspections | Avoids leaks and maintains optimal function |
By keeping your motorcycle clean, you’re not just preserving its looks—you’re ensuring it stays in top shape for years to come.
Tips for washing and detailing your bike
Washing your motorcycle doesn’t have to be complicated. Start by gathering the right tools: a bucket, mild soap, a sponge, and a soft cloth. Avoid harsh chemicals that can damage the paint or chrome. Use a hose with gentle water pressure to rinse off dirt before scrubbing.
Follow these simple steps for a thorough clean:
Rinse the bike to remove loose dirt.
Use soapy water and a sponge to clean the body, wheels, and other parts.
Dry it with a microfiber cloth to prevent water spots.
For detailing, focus on the small things. Polish the chrome and clean the mirrors. Use a chain cleaner to remove grime from the chain. Don’t forget to lubricate it afterward. A little extra effort goes a long way in making your bike shine.
Tip: Wash your bike in the shade to avoid soap drying too quickly and leaving streaks.
Regular cleaning not only keeps your motorcycle looking great but also helps it perform better. It’s a simple way to show your bike some love and keep it road-ready.
Final Safety Checks
Check the horn and mirrors
Before riding, make sure your horn and mirrors work. These might seem small, but they’re very important for safety. The horn helps you warn others on the road. Press it to see if it’s loud and clear. If it’s weak or silent, check the wires or replace it.
Mirrors let you see what’s behind you. Adjust them so you can see both sides without turning your head. Look for cracks or loose parts. A broken mirror can make it harder to see cars or obstacles.
Tip: Use a microfiber cloth to clean your mirrors before riding. Dust and smudges can block your view.
Take a short test ride to check everything
A quick ride is the last step before hitting the road. It helps you make sure your motorcycle is ready. Start by testing the brakes. Press them gently, then harder. They should stop smoothly without squeaking or delays.
Check the throttle and clutch next. Twist the throttle to see if the bike speeds up smoothly. Pull the clutch lever to make sure it works properly. Listen for strange noises from the engine or chain.
Here’s a table of key safety tests:
Test Type | What It Checks |
|---|---|
Dry Brake Test | Tests brakes one at a time under normal load. |
High Speed Test | Checks braking when stopping quickly at high speeds. |
Wet Brake Test | Tests brakes in wet conditions by spraying water on the brake disc. |
Heat Fade Test | Makes sure brakes work after heavy use. |
ABS Performance Tests | Checks how well anti-lock brakes work in emergencies. |
During the ride, notice the steering and suspension. The handlebars should feel steady, and the suspension should handle bumps well. If something feels wrong, stop and fix it before continuing.
Reminder: A short test ride isn’t just for finding problems—it’s to make sure your bike is ready to perform its best.
Taking care of your motorcycle isn’t just about stopping breakdowns. It’s also about making rides safer and more fun. Regular maintenance keeps your bike working well. It also helps you find small problems early before they get expensive. Did you know regular care can cut emergency repairs by 25%? That saves money and gives you peace of mind.
Why not make a plan that fits your schedule? You can do weekly checks or monthly tune-ups. Following a routine keeps your bike dependable for a long time. It also makes every ride smoother and safer. Your motorcycle deserves care, and so do you!
FAQ
What tools do I need for basic sportbike maintenance?
You’ll need a tire gauge, chain cleaner, lubricant, multimeter, and toolkit. These tools help with most simple checks and repairs. 🛠️
How often should I check my tire pressure?
Check tire pressure before every ride. Correct pressure keeps you safe and helps tires last longer. Cold tires give the best readings.
Can I use car oil in my sportbike?
No, car oil isn’t good for motorcycles. Motorcycle oil has special additives for wet clutches and high-speed engines. Always use the oil listed in your manual.
Tip: Follow the maker’s advice for better engine health and performance.
