Beginner’s Guide to Upgrading Purple Kawasaki Ninja 650 Fairings

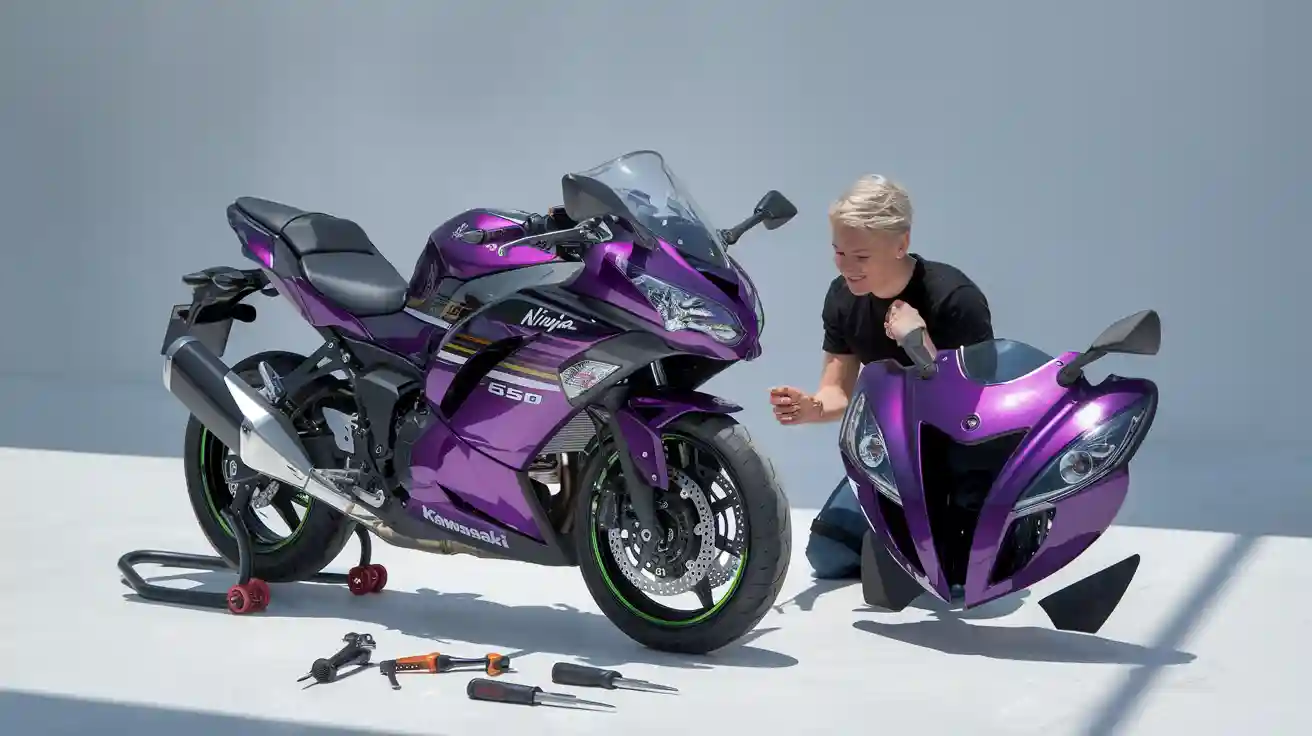
You might consider upgrading your purple kawasaki ninja 650 fairings for several reasons. Many riders notice loose or misaligned fairings after wear or minor impacts. Some fairings suffer damage from accidents, such as scratches or cracks that are hard to fix. Others want to boost their bike’s look or improve aerodynamics with modern fairings.
- Loose or misaligned fairings can affect safety.
- Damaged fairings may need replacement.
- New fairings can refresh your bike’s style.
Choosing the Right 2016 Model Fairings for Purple Kawasaki Ninja 650
Compatibility with 2012-2016 Ninja 650 Models
You want to make sure your new fairings fit your bike. The 2016 model fairings work with Kawasaki Ninja EX650 bikes from 2012 to 2016. These fairings use OEM grade ABS plastic and injection molding technology. This process gives you strong and precise parts. You get pre-drilled holes and correct tabs, so the fairings line up perfectly with your bike.
Here is a quick look at the key compatibility features:
| Specification Aspect | Details |
|---|---|
| Compatible Models | Kawasaki Ninja EX650 (2012, 2013, 2014, 2015, 2016) |
| Material | OEM Grade ABS Plastic |
| Manufacturing Process | Injection Molding Technology |
| Fitment | Pre-drilled precision OEM fitment |
| Included Parts | Nose fairing, side body fairings, tail fairing, front fender, tank cover (optional), trim kit |
| Additional Features | Free heat shield, multi-layer paint with UV protection, free windshield |
| Warranty/Guarantee | 100% OEM fitting guarantee |
You should check your bike’s year and model before you buy. If you own a purple kawasaki ninja 650 from 2012 to 2016, these fairings will fit without extra work.
Where to Buy and What to Look For in Fairing Kits
You can find fairing kits online or at motorcycle shops. Many riders choose trusted sellers who offer OEM quality. Look for kits that use ABS plastic and have a good paint job. Some kits include extra clear coats and stainless steel bolt kits for free. These features help your fairings last longer and look better.
Tip: Always check if the kit comes with a warranty or fitting guarantee. This protects you if the parts do not fit your bike.
Here is a checklist to help you pick the best fairing kit:
- OEM grade ABS plastic
- Injection molded for strength
- Pre-drilled holes for easy fitment
- Multi-layer paint with UV protection
- Free heat shield and windshield
- Stainless steel bolt kit included
- Warranty or fitting guarantee
You should compare kits before you buy. Kits for the 2016 Ninja 650 often have better paint and extra features than older models. This makes your bike look new and protects it from damage.
Preparing for Fairing Installation on Purple Kawasaki Ninja 650
Essential Tools and Materials Checklist
Before you start working on your purple kawasaki ninja 650, gather all the tools and materials you need. Having the right items helps you work faster and keeps your bike safe from damage. Here is a checklist to guide you:
- High-grade aluminum fasteners (dome head bolts, countersunk bolts)
- Washers, including anti-scratch washers
- Clips and nuts for replacing old backing clips
- Copper grease sachet for smooth installation
- Plastic tubing for cable protection
- Allen keys that fit your bolts
- Quick release 1/4 turn fasteners (D-Ring or Allen key style)
These tools help you attach the side fairings, front fender, belly pan, seat unit, and nose cone. You should check each item before you begin. Missing tools can slow you down or cause mistakes.
Tip: Lay out your tools on a clean towel or tray. This keeps small parts from rolling away and makes it easy to find what you need.
Safely Removing Old Fairings
You need to remove the old fairings before you install new ones. Start by parking your bike on a flat surface. Turn off the engine and let it cool down. Use the correct Allen keys to loosen the bolts. Keep each bolt and washer in a small container so you do not lose them.
Work slowly and gently. Pull each fairing piece away from the bike without forcing it. If you feel resistance, check for hidden bolts or clips. Use plastic tubing to protect any cables that run near the fairings. If you see damaged clips or nuts, replace them with new ones from your kit.
Note: Take photos as you remove each part. These photos help you remember where each bolt and clip goes when you install the new fairings.
Installing New 2016 Fairings on Purple Kawasaki Ninja 650
Step-by-Step Installation Instructions
You have removed your old fairings and gathered your tools. Now you can start installing the new 2016 fairings. Follow these steps to make sure each piece fits well and looks great:
-
Inspect Each Fairing Piece
Check every new fairing for cracks or paint flaws. Make sure all mounting holes line up with your bike’s frame. -
Install the Nose Fairing
Hold the nose fairing in place. Align the holes with the mounting points on your bike. Insert the bolts by hand first. Tighten them with an Allen key, but do not overtighten. -
Attach the Side Fairings
Place the left and right side fairings onto the frame. Start with the top bolts and work your way down. Use washers to protect the paint. Secure each bolt, but leave them a little loose until all bolts are in place. This helps you adjust the fit. -
Fit the Tail Fairing
Slide the tail fairing over the rear frame. Align it with the seat and rear lights. Insert the bolts and tighten them evenly. -
Mount the Front Fender
Position the front fender over the wheel. Use the correct bolts and washers. Make sure the fender does not touch the tire. -
Install the Tank Cover (if included)
Place the tank cover over the fuel tank. Align the tabs and secure it with the provided fasteners. -
Double-Check All Fasteners
Go over each bolt and nut. Make sure everything is tight but not stripped. Check that all fairings sit flush with the frame.
Tip: Take your time during installation. Rushing can lead to misaligned panels or scratched paint.
Here is a quick reference table for bolt torque settings:
| Fairing Part | Recommended Torque (Nm) |
|---|---|
| Nose Fairing | 5-7 |
| Side Fairings | 5-7 |
| Tail Fairing | 5-7 |
| Front Fender | 6-8 |
| Tank Cover | 4-6 |
Common Installation Mistakes to Avoid
You want your purple kawasaki ninja 650 to look its best. Avoid these common mistakes to get a professional result:
-
Overtightening Bolts
If you overtighten bolts, you can crack the fairing or strip the threads. Always use the correct torque. -
Forgetting Washers
Washers protect the paint and help spread the pressure. Missing washers can cause scratches or dents. -
Misaligning Panels
If you force a panel into place, you might break a tab or create gaps. Always check alignment before tightening bolts. -
Skipping a Test Fit
Before final tightening, loosely fit all panels. This helps you adjust the fit and avoid stress on the plastic. -
Ignoring Cable Routing
Make sure no cables get pinched between the fairings and the frame. Use plastic tubing to protect any exposed wires.
Note: If you feel resistance when installing a panel, stop and check for hidden bolts or clips. Forcing parts can cause damage.
-
Not Checking for Left/Right Parts
Some fairings look similar but only fit one side. Double-check each piece before installation. -
Rushing the Process
Take your time. Careful work leads to a better finish and fewer problems later.
By following these steps and avoiding common mistakes, you can install your new fairings with confidence. Your bike will look sharp and feel solid on every ride.
Customizing and Painting Purple Kawasaki Ninja 650 Fairings
Choosing Paint Types and Purple Color Codes
When you want to customize your fairings, picking the right paint type is important. The paint you choose affects how your bike looks and how long the finish lasts. Here are some paint types you can use for your fairings:
- Urethane paints: These paints give you a strong, glossy finish. They resist chemicals and UV rays, so your fairings stay bright and shiny.
- Acrylic enamel paints: These paints dry quickly and give a glossy look. They resist fading and chipping, which helps your fairings last longer.
- Specialty motorcycle paints: These paints stick well to plastic and metal. They come in unique colors and last a long time.
You should also think about the finish. Glossy finishes look bright and catch the eye. Matte finishes look modern and sleek. Most riders choose a glossy finish for a purple kawasaki ninja 650 because it stands out.
When you look for purple color codes, you may notice that Kawasaki does not list many purple options. Some sellers offer a "Gloss Carbon Fiber Style with Purple" finish. This color is vibrant and lasts a long time. If you want a perfect match, you can use touch-up paint from brands like TouchUpDirect. They offer color match guarantees, but you may need to ask for a custom purple code.
Tip: Always check if your paint is UV-resistant. This helps your fairings keep their color in the sun.
DIY Paint Process: Preparation, Priming, Painting, Finishing
You can paint your fairings at home if you follow the right steps. Here is a simple guide to help you get a smooth, professional look:
-
Preparation
- Clean your fairings with soap and water. Remove all dirt and grease.
- Sand the surface with fine-grit sandpaper. This helps the paint stick.
- Wipe the fairings with a tack cloth to remove dust.
-
Priming
- Spray a plastic primer on the fairings. Hold the can about 8 inches away.
- Let the primer dry for at least 30 minutes.
- Lightly sand the primer with very fine sandpaper for a smooth base.
-
Painting
- Shake your paint can well. Spray thin, even coats over the fairings.
- Wait 10-15 minutes between coats. Apply 2-3 coats for full coverage.
- For a purple finish, use a color like "Gloss Carbon Fiber Style with Purple" or a custom purple shade.
-
Finishing
- After the paint dries, spray a clear coat for extra shine and protection.
- Let the clear coat dry for several hours.
- Buff the surface with a soft cloth for a glossy finish.
Note: Always paint in a well-ventilated area. Wear a mask and gloves to protect yourself.
Professional vs. DIY Paint Jobs: Pros and Cons
You can choose to paint your fairings yourself or hire a professional. Each option has its own benefits and drawbacks.
| Option | Pros | Cons |
|---|---|---|
| DIY Paint Job | Saves money, lets you pick your own colors, gives you hands-on experience | Takes time, needs careful prep, may not look professional |
| Professional | High-quality finish, uses advanced tools, lasts longer | Costs more, less control over color choices |
A professional shop uses urethane or specialty paints with 2k coatings. These paints last longer and resist chemicals and weather. You get a smooth, glossy finish that looks like it came from the factory. If you want to save money and enjoy the process, a DIY job works well. Acrylic enamel paints are easier to use and still give good results if you follow each step.
If you want your purple kawasaki ninja 650 to look unique and last for years, choose quality paint and take your time with each step.
Maintaining Custom Fairings on Purple Kawasaki Ninja 650
Cleaning and Protecting Your Custom Paintwork
You want your custom fairings to look new and last a long time. Regular cleaning and careful protection help you keep the paintwork fresh. Monster Fairings uses high-quality ABS plastic and a seven-stage paint process. Their premium clear coat with UV protection keeps your fairings safe from fading and damage.
Start by gathering the right cleaning supplies. Use mild soap, such as diluted Dawn dish soap, or a motorcycle cleaner. Pick soft sponges and microfiber cloths. These tools help you avoid scratches.
Here is a simple cleaning routine you can follow:
- Rinse your motorcycle with water to remove loose dirt.
- Spray the soap solution and let it sit for a minute.
- Rinse again with clean water.
- Gently scrub the fairings with a sponge soaked in soapy water. Change the sponge often.
- Rinse the bike one last time.
- Dry the fairings with a clean microfiber cloth.
Tip: Clean your fairings after every ride in harsh conditions. Wash them right away if you ride near salt or ocean air.
Protect your paintwork by using a clear protective film on high-contact areas. This film shields your fairings from scratches and small impacts. Avoid harsh chemicals and abrasive materials when you wash your bike. Store your motorcycle in a garage or under a cover to block UV rays and dust.
You can also use a plastic polish spray after drying. This spray adds shine and helps protect the surface. Handle your bike with care during maintenance and transport to prevent marks.
| Maintenance Step | Purpose |
|---|---|
| Regular cleaning | Keeps paint bright and fresh |
| Use mild detergents | Prevents damage to paint |
| Dry with microfiber | Avoids scratches and water spots |
| Apply polish spray | Adds shine and protection |
| Cover bike after cleaning | Blocks UV rays and dust |
Taking these steps helps you keep your purple kawasaki ninja 650 looking its best for years.
Upgrading your fairings gives you many benefits. You improve aerodynamics, protect your bike’s parts, and add your own style. Before you start, check your bike’s condition and make sure parts are easy to find.
- You can join online communities for advice and support.
- Custom fairings can boost comfort and resale value.
| Factor | Why It Matters |
|---|---|
| Bike Condition | Ensures safe customization |
| Parts Availability | Makes upgrades easier |
Personalizing your purple kawasaki ninja 650 brings pride and lasting value.
FAQ
How do you know if a fairing kit will fit your Ninja 650?
You should check the year and model of your bike. Most 2012-2016 Ninja 650 fairings fit without extra work. Always compare the product details with your bike’s information before you buy.
Can you install new fairings without special tools?
You can use basic tools like Allen keys, screwdrivers, and a socket set. Some kits include all needed fasteners. You do not need advanced tools for most installations.
What should you do if your new fairings do not align?
Tip: Loosely fit all panels before tightening bolts.
If a panel does not align, check for hidden clips or bolts. Adjust the fit and try again. Do not force the parts.
How long does a DIY paint job usually last?
A DIY paint job can last several years if you use quality paint and clear coat. Regular cleaning and protection help keep the finish looking new.
Will custom fairings affect your bike’s resale value?
Custom fairings can increase resale value if you use quality parts and professional paint. Buyers often like unique styles and well-maintained bikes.
See Also
Top Quality Aftermarket Fairings For Your Kawasaki Ninja 400
Easy Replacement Tips For 2019 BMW S1000RR Fairings
How To Install Honda CBR500R Fairing Kits Step By Step
A Complete Guide To Repairing And Replacing Motorcycle Fairings
