Tips for a Smooth White Fairing Installation on the Ninja ZX6R

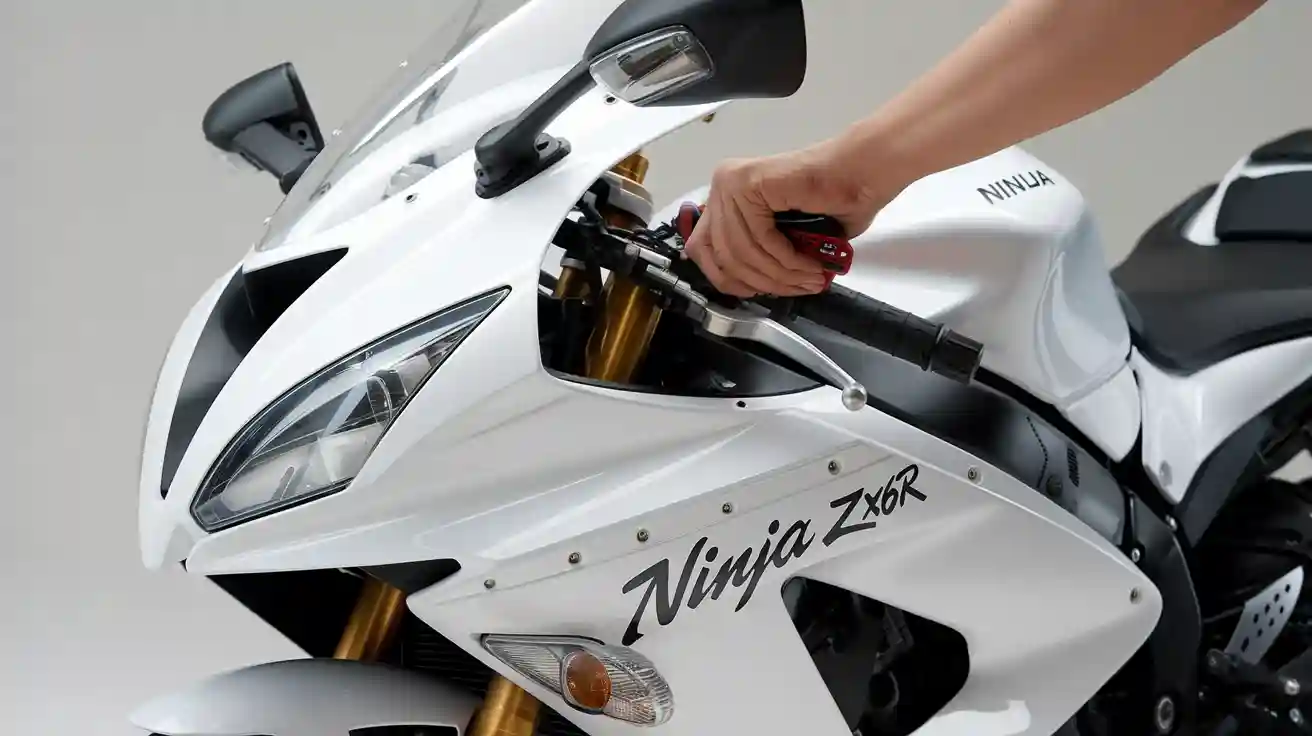
Selecting the right kawasaki ninja zx6r white fairing helps you avoid installation problems. You should check the fit and quality before you buy. Make sure you know the total price, including shipping and extra parts. Use the correct tools and follow each step carefully. This approach lets you achieve a clean, professional look for your motorcycle.
Kawasaki Ninja ZX6R White Fairing Options
OEM vs. Aftermarket Fairings
When you choose between OEM and aftermarket fairings, you need to think about fit, finish, and durability. OEM fairings come from the original manufacturer. They use high-quality materials and offer a perfect fit. You get a smooth surface and a color that matches the rest of your bike. Aftermarket fairings cost less and often fit well, but the finish may not look as good. The plastic in aftermarket kits can feel harder and less flexible. Sometimes, you may notice color differences, especially if you mix OEM and aftermarket panels. You might need extra materials, like neoprene foam, for heat protection with aftermarket options.
Tip: OEM fairings last longer and keep their color better, but aftermarket kits give you a fresh look for less money.
ABS Plastic vs. Polypropylene and Other Materials
You will find several materials used for kawasaki ninja zx6r white fairings. Each material has its own strengths and weaknesses. The table below helps you compare the most common options:
| Material | Advantages | Disadvantages |
|---|---|---|
| ABS Plastic | Affordable, lightweight, common | Less flexible, less impact-resistant |
| Polypropylene | More flexible, better impact resistance | Not as widely used |
| Fiberglass | Lightweight, affordable | Prone to shattering, low impact resistance |
| Carbon Fiber | Very strong, lightweight | Higher cost |
ABS plastic is the most popular choice. It keeps the fairing light and affordable. Polypropylene bends more and handles impacts better. Carbon fiber gives you strength and a cool look, but it costs much more.
Finish and Paint Quality for White Fairings
The finish and paint quality matter a lot for white fairings. Matching the factory paint color is hard. Even with special tools, you may see small differences because of sun fading or pollution. Aftermarket fairings sometimes use different plastics, which can change how the paint looks or sticks. If you paint your own fairings, you need to sand, prime, and spray them carefully. Custom painted fairings look unique, but they may not match the original color exactly. OEM fairings usually have a smoother finish and better color match. If you want to repair or touch up your fairings, you need some bodywork skills.
Note: Delays or mistakes at a paint shop can change the final color or finish, so always check the work before you install the fairings.
Cost Breakdown for Kawasaki Ninja ZX6R White Fairings
Price Ranges for OEM and Aftermarket Kits
You will find a wide range of prices when shopping for fairings. OEM kits usually cost more because they come from the original manufacturer. You can expect to pay between $800 and $1,500 for a full OEM set. Aftermarket kits cost less. Most aftermarket sets range from $350 to $700. These prices depend on the brand, material, and finish. Some kits include extra pieces, while others only cover the basics.
| Type | Price Range | What’s Included |
|---|---|---|
| OEM | $800 – $1,500 | Full set, best fit |
| Aftermarket | $350 – $700 | Full or partial set |
Tip: Always check what comes in the kit before you buy. Some kits do not include all the panels you need.
Additional Costs: Shipping, Painting, and Hardware
You should plan for extra costs beyond the fairing kit. Shipping can add $50 to $200, depending on your location and the seller. If you want a custom paint job for your kawasaki ninja zx6r white fairing, you may pay $200 to $500 more. Hardware like bolts, clips, and brackets can cost another $30 to $100. Sometimes, you need to replace broken or missing fasteners.
- Shipping: $50 – $200
- Custom painting: $200 – $500
- Hardware: $30 – $100
Budgeting Tips for Custom White Fairings
Set a clear budget before you start your project. Write down all possible costs, including the fairing kit, shipping, paint, and hardware. Leave some extra money for unexpected expenses. Compare prices from different sellers. Look for package deals that include hardware or free shipping. If you want a custom look, ask for paint samples first. This helps you match the color and avoid surprises.
Remember: Careful planning saves you money and stress during your kawasaki ninja zx6r white fairing installation.
Installation Tips for Kawasaki Ninja ZX6R White Fairings
Essential Tools and Preparation Checklist
Before you start, you need to gather the right tools. Having the correct tools makes the job easier and helps you avoid damaging your new fairings. Here is a list of tools you should prepare:
- 3/8ths ratchet driver
- Allen key socket set (make sure you have at least a 4mm size)
- Regular 6-point socket set
You should also have a clean workspace. Lay out a soft blanket or mat to protect your new kawasaki ninja zx6r white fairings from scratches. Keep all your fasteners in a small container so you do not lose them. Take photos of your bike before you remove any parts. These photos help you remember where each piece goes during reassembly.
Tip: Wear gloves to keep fingerprints off the white finish and to protect your hands from sharp edges.
Step-by-Step Installation Guide
You can install your new fairings by following these steps. Take your time and check your work as you go.
-
Remove the Old Fairings:
Use your ratchet driver and Allen keys to take off the bolts and screws. Start with the side panels, then move to the front and rear sections. Place each fastener in your container. -
Inspect Mounting Points:
Check the frame and mounting tabs for damage or dirt. Clean these areas with a soft cloth. Make sure all brackets are straight and ready for the new fairings. -
Test Fit the New Fairings:
Hold each new panel up to the bike before you bolt it on. This helps you spot any fitment issues early. Adjust the panels if needed. -
Install the New Panels:
Start with the lower fairings and work your way up. Use your socket set and Allen keys to tighten the bolts. Do not over-tighten, as this can crack the plastic. -
Check Alignment:
Step back and look at the bike from different angles. Make sure all gaps are even and the panels line up with each other. -
Secure All Fasteners:
Go over each bolt and screw to make sure they are snug. Double-check the areas around the headlights and tail section. -
Clean the Surface:
Wipe down the new fairings with a microfiber cloth. This removes dust and fingerprints and gives your bike a fresh look.
Note: If you feel unsure at any step, ask a friend for help or consult a repair manual.
Common Mistakes to Avoid During Installation
You can avoid many problems by watching out for these common mistakes:
-
Forgetting to organize fasteners:
Mixing up bolts and screws can slow you down. Always keep them sorted. -
Over-tightening bolts:
Tightening bolts too much can crack the fairings or strip the threads. Use gentle pressure. -
Skipping the test fit:
If you do not test fit each panel, you might find out too late that something does not line up. -
Touching the white finish with dirty hands:
Dirt and oil can stain the surface. Always wash your hands or wear gloves. -
Ignoring alignment:
Misaligned panels look bad and can cause rattling. Take time to adjust each piece.
Alert: If you see large gaps or panels that do not fit, do not force them. Forcing parts can break the fairings or damage your bike.
By following these tips, you can install your kawasaki ninja zx6r white fairings smoothly and get a clean, professional result.
When to Seek Professional Installation Help
Sometimes, installing new fairings on your Ninja ZX6R can feel overwhelming. You might want to do it yourself, but some situations call for a professional. Knowing when to ask for help can save you time, money, and frustration.
Signs You Should Consider Professional Help
-
Complex Damage or Frame Issues
If your motorcycle has frame damage or bent mounting points, you should not try to fix it alone. A professional can check for hidden problems and make sure your bike stays safe. -
Electrical Components Involved
Some fairings cover wires, lights, or sensors. If you see many wires or connectors, you might need a technician. Mistakes with electrical parts can cause bigger issues later. -
Fitment Problems with Aftermarket Kits
Aftermarket fairings sometimes do not fit perfectly. If you struggle to line up panels or see large gaps, a shop can adjust or trim the pieces for you. -
Lack of Tools or Experience
You need special tools for some steps. If you do not have the right tools or have never worked on a motorcycle, you could damage the fairings or your bike. -
Custom Paint or Graphics
Custom paint jobs need skill and special equipment. If you want a flawless finish, a professional painter can match colors and apply clear coats.
Tip: If you feel unsure at any step, it is better to ask for help than to risk breaking a part or hurting yourself.
Benefits of Professional Installation
| Benefit | Description |
|---|---|
| Expert Fitment | Professionals know how to align panels perfectly |
| Time Savings | Shops work faster and avoid common mistakes |
| Warranty Protection | Some shops offer a warranty on their work |
| Quality Finish | You get a smooth, clean look with no rough edges |
You can also ask the shop to check your bike for other issues during the installation. This gives you peace of mind and helps your motorcycle last longer.
How to Choose the Right Professional
- Look for shops with experience working on sport bikes.
- Ask for photos of past fairing installations.
- Read reviews from other riders.
- Get a clear price quote before you agree to the work.
Note: Bringing your own fairing kit to a shop is common. Make sure the shop is willing to install aftermarket parts if you did not buy the kit from them.
You do not have to do everything yourself. Sometimes, letting a professional handle the kawasaki ninja zx6r white fairing installation is the smartest choice.
Maintenance and Care for Kawasaki Ninja ZX6R White Fairings
Cleaning and Protecting the White Finish
Keeping your fairings clean helps them look new and bright. White fairings show dirt and stains more than darker colors. You should wash your bike often, especially after riding in rain or on dusty roads. Use a soft sponge and mild soap. Avoid harsh chemicals that can damage the paint. Rinse with clean water and dry with a microfiber towel to prevent water spots.
To protect the finish, apply a quality wax or paint sealant every few months. This adds a layer that blocks UV rays and keeps the color from fading. Park your bike in the shade or use a cover when you can. This stops sun damage and keeps the white finish from turning yellow. If you see bugs or tar, clean them off right away. These can stain the paint if left too long.
Tip: Always use clean cloths and soft brushes. Scratches can show up easily on white surfaces.
Touch-up and Repair Advice for White Fairings
Small chips and scratches can happen, but you can fix many of them at home. You should repair minor cracks or scratches as soon as you notice them. This stops the damage from getting worse. Use a repair kit made for motorcycle fairings to patch small cracks. For tiny scratches, touch-up paint or color-matched paint pens work well. Test any product on a hidden spot first to make sure it matches.
If you want a smooth, professional result, follow these steps:
- Sand the damaged area gently with wet 400 grit sandpaper. Keep the sandpaper wet to avoid harming the plastic.
- Clean the spot and apply a high-quality automotive primer.
- Use a spray gun with the right tip size for even paint coverage. Paint the fairing in an upright position to stop runs.
- Let the paint dry as the instructions say. Do not rush this step.
- If you add decals, prime and clear coat the fairing first. Scuff the area before applying the decal, then seal it with a clear coat.
- For scuffed areas, buff gently with a mild abrasive compound.
- Avoid sanding too much after priming unless you need to fix high or low spots.
- Always wear a dust mask when sanding or painting for safety.
If you see deep cracks or large damage, seek help from a professional. They have the tools and skills to restore your fairings. This keeps your bike looking its best and protects your investment.
Choosing the right kawasaki ninja zx6r white fairing gives your bike a clean look and makes installation easier. Careful budgeting helps you avoid surprises. When you follow each step and use the right tools, you get a smooth result.
- Plan your project before you start.
- Pay attention to details during installation.
- Maintain your fairings to keep them looking new.
Remember, a little extra effort leads to the best finish for your kawasaki ninja zx6r white fairing.
FAQ
How often should you clean your white fairings?
You should clean your white fairings every week or after each ride in dirty conditions. Regular cleaning keeps the color bright and prevents stains from sticking.
Tip: Use a soft sponge and mild soap to avoid scratching the surface.
Can you install fairings without special tools?
You can install fairings with basic tools like a ratchet, Allen keys, and screwdrivers. Special tools make the job easier, but you do not need them for most installations.
- Always check your tool kit before starting.
What should you do if a fairing panel does not fit?
Test fit each panel before final installation. If a panel does not fit, check for bent brackets or leftover debris. Do not force the panel. You may need to trim or adjust it slightly.
Alert: For major fitment issues, contact the seller or seek professional help.
Will aftermarket fairings affect your bike’s performance?
Aftermarket fairings do not change your bike’s engine or speed. They may weigh a little more or less than OEM parts. Most riders do not notice any difference in daily use.
How can you prevent yellowing on white fairings?
Keep your bike out of direct sunlight when possible. Use a UV-protective wax or sealant every few months. Clean off bugs and stains quickly to stop discoloration.
Note: Parking in the shade or using a cover helps protect the white finish.
See Also
Complete Instructions For Installing Honda CBR500R Fairings
Best Reviewed Aftermarket Fairings For The ZX6R
Unique Motorcycle Fairings Available At Nicefairings
