Step-by-step guide to installing Honda CBR500R fairing kits
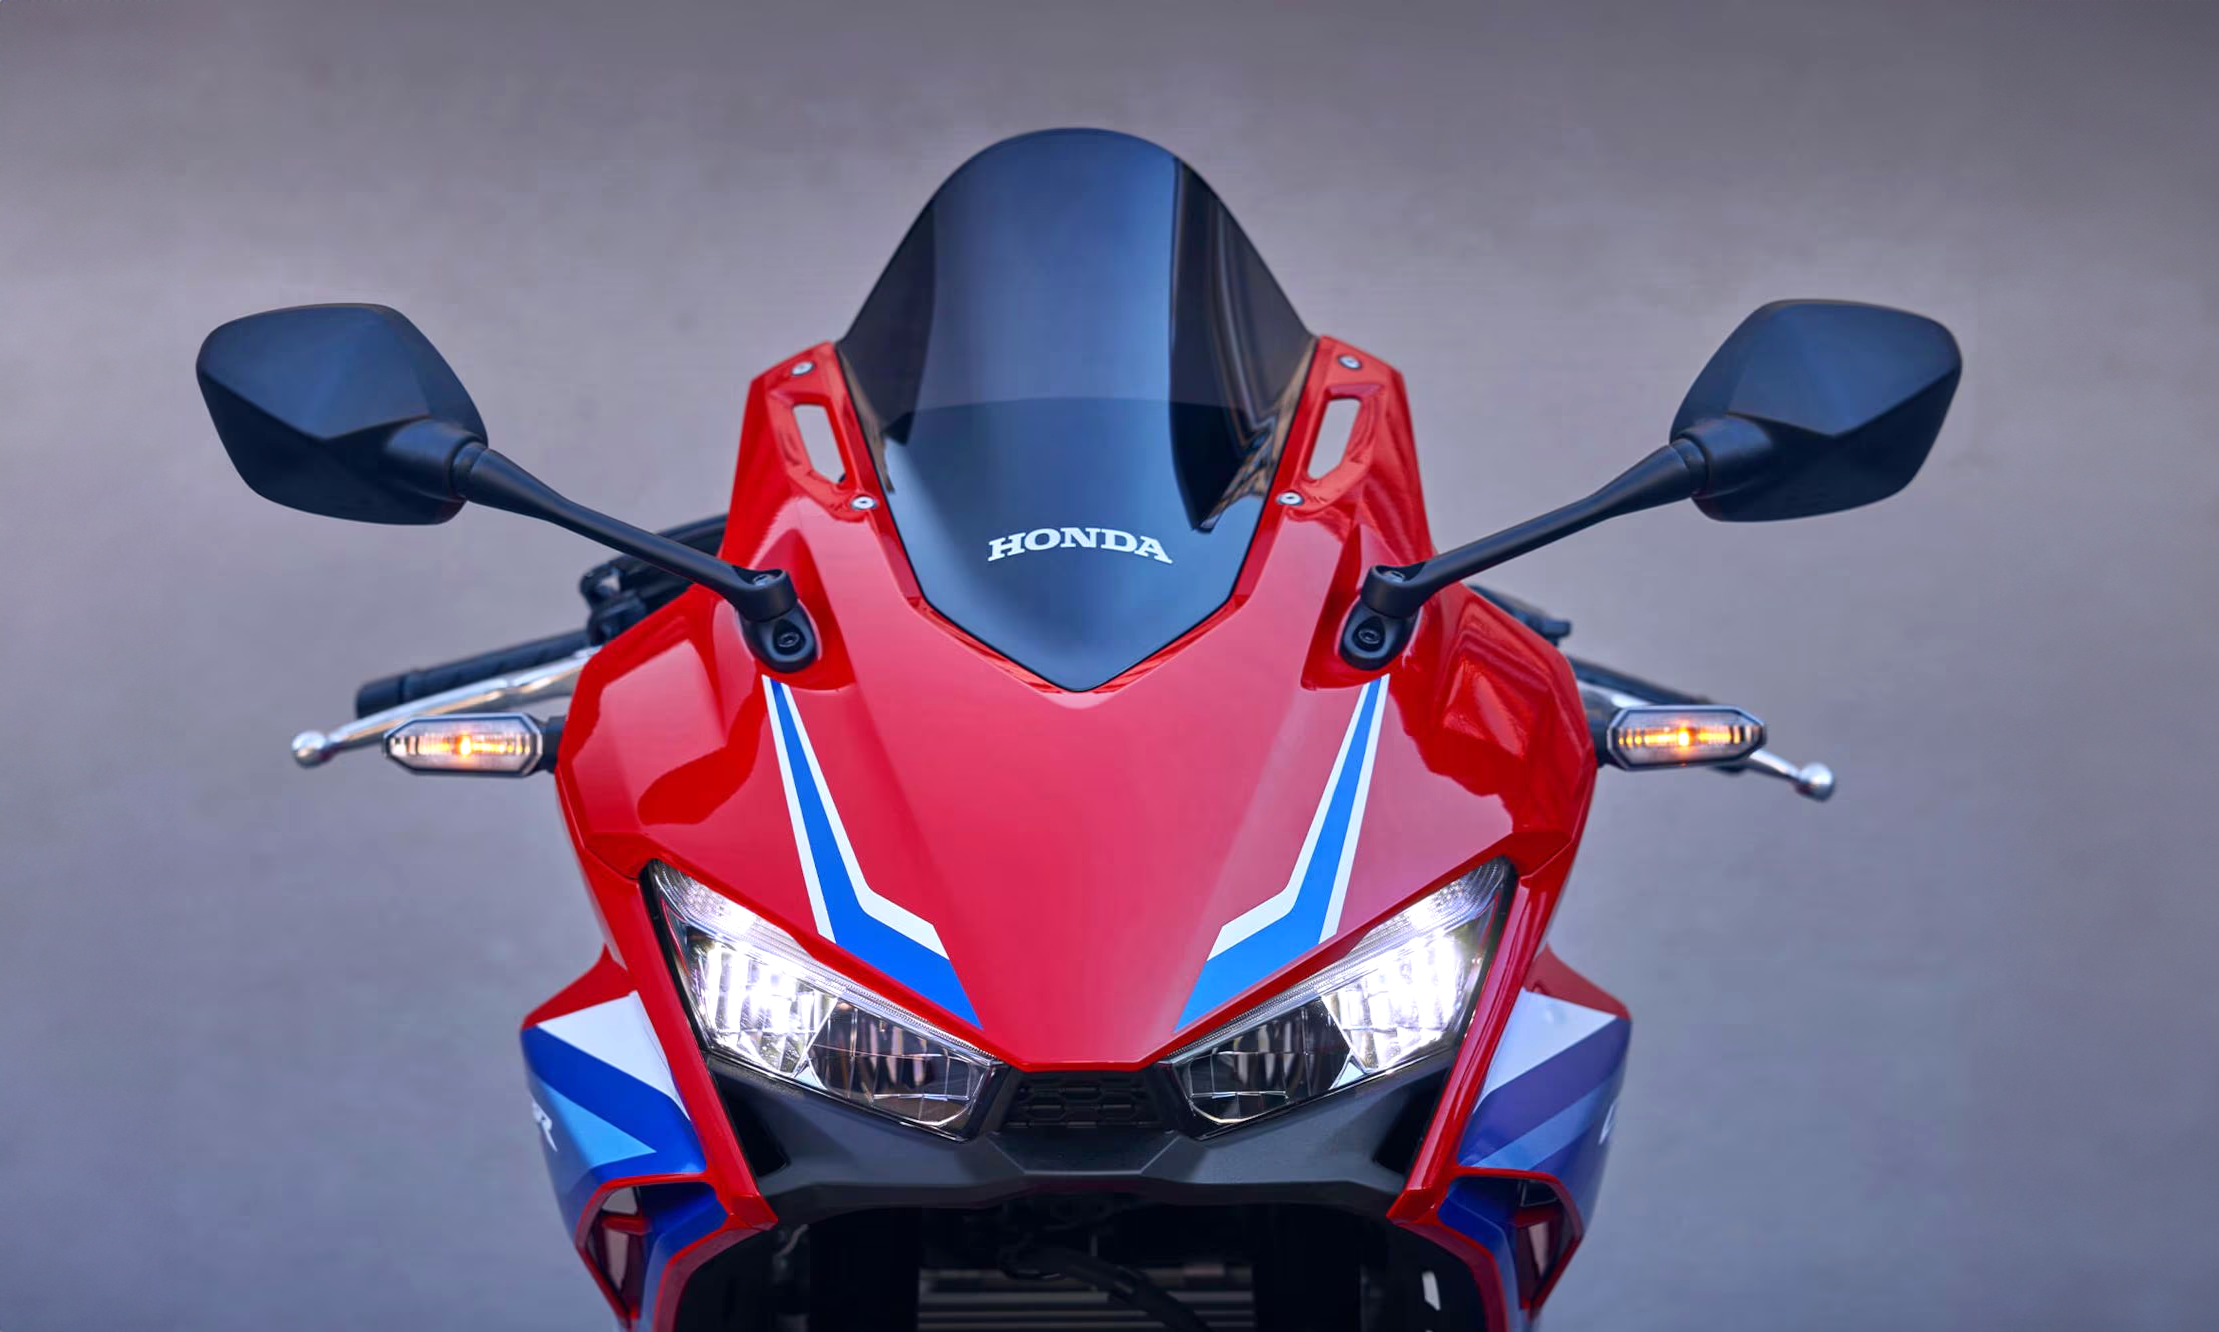
Installing a Honda CBR500R fairing kit is a fantastic way to upgrade both the appearance and performance of your bike. This guide is designed to simplify the process, ensuring it’s easy and hassle-free, even for those new to motorcycle modifications. A Honda CBR500R fairing does more than just enhance the bike’s style—it also optimizes aerodynamics.
It minimizes drag, promoting smoother airflow around your Honda CBR500R and improving fuel efficiency.
It helps balance air pressure, providing better control, particularly in windy conditions.
It enhances riding comfort by significantly reducing wind fatigue.
With this guide, you’ll be ready to install the fairing and give your Honda CBR500R a sleek, modernized look.
Key Takeaways
Get tools like screwdrivers, Allen wrenches, and a clip remover.
Wash your bike well so the new fairings fit right.
Work step-by-step: take off old fairings, put on new ones, and check they line up neatly.
Don’t tighten screws too much, or the fairings might break.
Test ride your bike to make sure it’s safe and steady.

Tools and Preparation for Honda CBR500R Fairing Installation
Before diving into the installation process, it’s important to gather the right tools and prepare your workspace. This step ensures a smooth and hassle-free experience while working on your Honda CBR500R fairings.
Essential Tools
You’ll need a few basic tools to get started. Here’s a quick checklist:
Screwdrivers: Both Phillips and flathead screwdrivers are essential for removing and securing various screws.
Allen wrenches: These are perfect for handling hex bolts commonly found on motorcycles.
Socket wrench set: A versatile tool for loosening and tightening bolts of different sizes.
Plastic fastener removal tool: This helps you safely remove clips without damaging them or the surrounding parts.
Microfiber cloths: Use these to clean surfaces and avoid scratches on your new fairings.
Having these tools ready will save you time and frustration during the installation process.
Preparation Steps
Proper preparation is key to a successful installation. Follow these steps to get your bike and workspace ready:
Clean your motorcycle: Dirt and grease can interfere with the installation. Use hot water and car wash soap to clean the bike thoroughly. For wheels and tricky areas, Simple Green works wonders. Dish soap is another great option for cutting through grease.
Organize the fairing kit components: Lay out all the parts from your kit and double-check that nothing is missing. This step ensures you won’t face surprises mid-installation.
Set up your workspace: Choose a clean, flat area with plenty of light. A well-organized space makes the process much easier.
Wear gloves: Gloves protect the fairings from fingerprints and accidental scratches. They also keep your hands clean while handling the parts.
By following this guide, you’ll be fully prepared to install your Honda CBR500R fairings with confidence and ease.
Step-by-Step Guide to Installing Honda CBR500R Fairing Kits
Removing the Existing Fairings
The first step in this process is to remove the old fairings from your Honda CBR500R. Don’t worry—it’s easier than it sounds if you follow this step by step guide.
Unscrew bolts securing the headlights and air duct components.
Start by locating the bolts that hold the headlights and air duct components in place. Use the appropriate screwdriver or socket wrench to carefully unscrew them. Keep these bolts in a safe spot, as you might need them later.
Use a plastic fastener removal tool to detach clips without damage.
Next, grab your plastic fastener removal tool. This tool is perfect for popping out the clips without scratching or breaking them. Work slowly and gently to avoid damaging the surrounding areas.
Carefully remove the old fairings and set them aside.
Once the bolts and clips are out, you can carefully pull off the old fairings. Take your time here to avoid bending or cracking any parts. Place the removed fairings in a clean, safe area—you never know when you might need them again.
Installing the Main Fairings
Now that the old fairings are off, it’s time to install the new ones. This step is where your Honda CBR500R starts to transform.
Align the new main fairings with the pre-drilled mounting points.
Take the new main fairings and align them with the pre-drilled mounting points on your bike. This step ensures everything fits perfectly. Double-check the alignment before moving forward.
Secure the fairings using the provided screws and bolts.
Once aligned, use the screws and bolts that came with your fairing kit to secure the panels. Tighten them just enough to hold the fairings in place, but don’t overdo it—over-tightening can cause cracks.
Check alignment to ensure a proper fit.
Before moving on, take a moment to inspect the alignment. Make sure the fairings sit flush against the bike and that all edges line up correctly. A quick check now can save you from headaches later.
Attaching the Nose Cone
The nose cone is a key part of your Honda CBR500R’s new look. Installing it is straightforward if you follow these steps.
Position the nose cone at the front of the bike.
Hold the nose cone up to the front of your bike. Align it with the mounting points, ensuring it sits evenly on both sides.
Fasten it securely using the appropriate screws.
Use the screws provided in your kit to attach the nose cone. Tighten them enough to keep the cone secure, but avoid over-tightening. Once done, give it a gentle wiggle to confirm it’s firmly in place.
By following this step by step guide, you’re well on your way to completing the installation of your Honda CBR500R fairing kit. Take your time with each step, and you’ll achieve a professional-looking result.
Installing the Tail and Seat Panel
Remove the seat to access the mounting points.
Start by removing the seat from your Honda CBR500R. Look for the release mechanism or screws holding it in place. Once located, use the appropriate tool to loosen and remove the seat. This step gives you access to the mounting points for the tail fairing and seat panel. Keep the seat in a safe spot to avoid any damage while you work.
Attach the tail fairing and seat panel, ensuring proper alignment.
Take the tail fairing and seat panel from your kit and align them with the mounting points. Make sure everything lines up perfectly before securing them. Use the screws or bolts provided in your Honda CBR500R fairing kit to attach the panels. Tighten them carefully, ensuring they’re snug but not over-tightened. This step is crucial for a clean and professional look.
Reinstall the seat once the panels are secured.
After securing the panels, it’s time to reinstall the seat. Align it with its original position and fasten it back into place. Double-check that it’s secure and sits flush with the new fairings. This final step completes the tail and seat panel installation.
Adding the Under Tray and Rear Hugger
Mount the under tray beneath the bike, securing it with screws.
The under tray is an essential part of your Honda CBR500R fairing kit. Position it beneath the bike, aligning it with the designated mounting points. Use the screws provided in the kit to secure it firmly. This step helps protect the underside of your bike while enhancing its overall look.
Attach the rear hugger to protect the rear wheel area.
Next, grab the rear hugger and align it with the rear wheel area. This component shields the wheel from debris and adds a sleek touch to your bike. Secure it using the screws or bolts included in your kit. Make sure it’s tightly fastened to prevent any movement during rides.
Securing the Front Fender
Align the front fender with the front wheel.
The front fender is the final piece of your Honda CBR500R fairing installation. Position it over the front wheel, ensuring it aligns perfectly with the mounting points. Take your time with this step to avoid any misalignment.
Fasten it using the provided screws and bolts.
Once aligned, use the screws and bolts from your kit to secure the fender. Tighten them evenly to keep the fender stable and in place. After completing this step, give the fender a quick check to ensure it’s properly secured and doesn’t wobble.
By following this step by step guide, you’ve successfully installed the tail, seat panel, under tray, rear hugger, and front fender. Your Honda CBR500R now boasts a refreshed look with perfectly fitted fairings.
Common Mistakes and Tips for Installing Fairings
Mistakes to Avoid
Over-tightening screws, which can crack the fairings.
One common mistake during fairings installation is over-tightening screws. It’s easy to think tighter is better, but this can actually crack the fairings. When securing screws, tighten them just enough to hold the panels firmly in place. If you’re unsure, stop and check the fit before applying more force.
Skipping the cleaning step, leading to poor adhesion or fit.
Skipping the cleaning step might seem like a time-saver, but it can cause big problems. Dirt and grease can prevent the fairings from fitting properly or sticking securely. Always clean your bike thoroughly before starting the installation. This step ensures a smooth process and a professional finish.
Misplacing screws or bolts during disassembly.
Losing screws or bolts can turn your step by step guide into a frustrating scavenger hunt. Keep a small container or tray nearby to store all the hardware you remove. This simple habit saves time and prevents unnecessary stress.
Pro Tip: Label the screws or bolts if they come from different sections of the bike.
Tips for a Smooth Installation
Take photos during disassembly to use as a reference.
Before removing any part, snap a few photos. These pictures act as a visual guide when it’s time to reassemble. You’ll thank yourself later when you’re trying to remember where each piece goes.
Work on one section at a time to stay organized.
Tackling one section at a time keeps the process manageable. Focus on completing each step fully before moving on to the next. This approach helps you stay organized and reduces the chance of mistakes.
Use thread locker on screws to prevent loosening over time.
A small dab of thread locker on screws can make a big difference. It keeps them from loosening due to vibrations while riding. This step adds an extra layer of security to your Honda fairings installation.
By avoiding these mistakes and following these tips, you’ll breeze through the installation process. This guide ensures your fairings are installed correctly, giving your bike a sleek and secure finish.
Final Checks After Installing Honda CBR500R Fairing Kits
Congratulations! You’ve installed your Honda CBR500R fairings. Now, it’s time to make sure everything is secure and ready for the road. This final step is crucial to ensure your hard work pays off with a safe and polished result.
Inspecting the Installation
Check all screws and bolts for tightness.
Grab your tools one last time and go over every screw and bolt you’ve installed. Make sure they’re tight enough to hold the panels securely but not so tight that they risk cracking the fairings. A quick check here can save you from issues later.
Ensure all panels are aligned and secure.
Take a step back and inspect the bike from all angles. Look closely at the alignment of each panel. Are the edges flush? Do the panels sit evenly? If anything seems off, adjust it now. This step ensures your bike looks as good as it performs.
Pro Tip: Use a flashlight to check hard-to-see areas for any loose screws or misaligned panels.
Test Ride
Take the bike for a short ride to ensure everything is stable.
Once you’re confident in the installation, it’s time for a test ride. Start with a slow, short ride around your neighborhood. Pay attention to how the bike feels. Does everything seem stable? This step helps you catch any issues before hitting higher speeds.
Listen for any unusual noises or vibrations.
While riding, listen carefully. Do you hear any rattling or vibrations? These could indicate a loose panel or screw. If you notice anything unusual, stop and inspect the bike. Tighten or adjust as needed. This step ensures your Honda is ready for the road.
By following this guide, you’ve completed the final step of your fairing installation. Your Honda CBR500R is now equipped with a sleek, secure, and aerodynamic upgrade. Enjoy the ride and the satisfaction of a job well done!
Installing a Honda CBR500R fairing kit might seem intimidating at first, but you’ve got this! Let’s quickly recap the process:
Gather your tools and prep your workspace.
Remove the old fairings carefully.
Install the new panels step by step, checking alignment as you go.
Finish with a test ride to ensure everything is secure.
Tip: Take your time and enjoy the process. Patience leads to a flawless finish!
Once you’re done, you’ll love the sleek new look and improved performance of your bike. There’s nothing quite like the satisfaction of upgrading your ride with your own hands. Now, go out and enjoy the road! 🚴♂️
FAQ
What is included in a Honda CBR500R fairing kit set?
A fairing kit set typically includes all the panels needed to replace your bike’s bodywork. This includes the main fairings, nose cone, tail section, and sometimes smaller components like the under tray and rear hugger.
How long does it take to install a fairing kit?
For beginners, installation can take 3-5 hours. If you’re experienced with motorcycle modifications, you might finish in 2-3 hours. Take your time to ensure proper alignment and secure fittings.
Do I need professional help to install the fairings?
Not necessarily! This guide is beginner-friendly, so you can handle the installation yourself. However, if you’re unsure or lack the tools, a professional can help ensure a perfect fit.
Can I paint the fairings before installation?
Yes, you can paint them before installing. Just make sure the paint is fully cured to avoid smudging during installation. Pre-painted fairing kits are also available if you want to skip this step.
How do I maintain my new fairings?
Clean them regularly with a microfiber cloth and mild soap. Avoid abrasive cleaners that can scratch the surface. Proper maintenance keeps your fairings looking fresh and extends their lifespan.

