Everything You Should Know Before Replacing Your R3 Fairings in 2025


You should learn about the new 2025 yzf-r3 fairings before replacing them. Yamaha uses strong materials like carbon fiber reinforced polymers and shape memory alloys in the new r3 fairings. These materials make your yamaha motorcycle lighter and stronger. The 2025 yzf-r3 has special shapes made with new methods, so you need to check every mounting point. The yzf-r3 fairings have built-in LED lighting, so you must check if the wires will work. Always read your yamaha owner’s manual and look at the frame carefully before you buy new fairings for your yzf-r3 motorcycle.
Key Takeaways
Make sure you know your Yamaha model year before you buy 2025 R3 fairings. This helps you get the right fit and stops problems with parts not matching.
Look at all mounting points and brackets closely. This makes sure the new fairings fit tight and line up right.
The 2025 fairings have LED lights built in. Check if your wiring harness works with them so you do not have electrical issues.
Pick your fairing materials carefully. Carbon fiber is strong and light. ABS plastic is tough and costs less.
Use step-by-step guides for putting on and caring for your fairings. This keeps them looking good and helps them last longer.
R3 Fairings Compatibility
Model Year Differences
Yamaha updates the yzf-r3 fairings almost every few years. The 2025 yzf-r3 fairings look different from the 2019 r3 and earlier models. You will notice sharper lines and new air ducts on the latest yamaha motorcycle. These changes help with cooling and make your motorcycle look modern. If you own a 2019 r3 or a 2020 model, you cannot swap the new yzf-r3 fairings directly. The mounting holes and shapes do not match. Always check the year of your yamaha before you buy new fairings. You should compare the shape and size of the yzf-r3 fairings with your current panels. This step helps you avoid buying parts that will not fit your motorcycle.
Tip: Ask your local yamaha dealer about fairings compatibility if you are unsure about your model year.
Mounting Points Check
Yamaha uses special mounting points for the 2025 yzf-r3 fairings. These points hold the fairings tight to the frame. If you try to use older yzf-r3 fairings, you may find that the holes do not line up. The 2025 yamaha motorcycle has extra brackets for the new fairings. You should inspect every mounting point on your yzf-r3 before you order new panels. Look for any changes in the frame or extra tabs. Use a flashlight to check under the seat and around the engine. If you see new brackets, you need fairings made for the 2025 yzf-r3.
Make a checklist before you buy:
Count all mounting holes on your current fairings.
Check for extra tabs or brackets on your yamaha motorcycle.
Match the shape of the new yzf-r3 fairings to your old ones.
If you skip this step, you might end up with loose or rattling fairings. Proper fit keeps your yamaha safe and looking sharp.
LED Lighting Integration
The 2025 yzf-r3 fairings come with built-in LED lighting. Yamaha uses advanced LED driver chips to control the lights. These chips help you get bright brake lights and dim tail lights. The wiring harness in your motorcycle must match the new fairings. If you ride a 2019 r3, your wiring may not support the new LED system. You should check the wiring diagram in your yamaha manual.
Here is a table that shows the main features of the LED system in the 2025 yzf-r3 fairings:
Feature/Parameter | Description/Specification |
|---|---|
LED Driver IC | MAX16804 high-brightness LED driver with PWM dimming |
Brightness Control | Full brightness for brake lights, 10-25% for tail lights |
Input Voltage Range | 6V to 16V (up to 45V during load dump) |
Output Current Settings | 350mA, 240mA, or 140mA selectable |
PWM Control | Internal PWM, duty cycle set by DIM pin voltage |
Protection Components | Diodes for reverse voltage, capacitors for noise filtering |
Wiring Harness | Compatible with standard yamaha motorcycle signals |
External Components | Minimal, easy to add to existing yzf-r3 fairings wiring |
You do not need many extra parts to connect the new LED lights. The system works with most yamaha motorcycle wiring harnesses. If you have a 2019 r3, you should double-check the connectors. Some older yzf-r3 fairings use different plugs. If the plugs do not match, you may need an adapter or a new harness. Always test the lights before you finish installing the fairings.
Note: Good LED integration means your lights work safely and look bright. Never skip the wiring check when you upgrade your yzf-r3 fairings.
YZF-R3 Fairings Fitment
Signs of Poor Fit
You can spot poor fitment on your yzf-r3 fairings by looking for several clear signs. Gaps between the fairings and the frame often show up first. You might see panels that do not sit flush or edges that stick out. When you ride your yamaha, loose fairings can rattle or make noise. Sometimes, the mounting clips do not stay in place, even if you use new ones. This problem happens with both aftermarket and some r3 fairings that claim to fit perfectly.
If you notice that your yzf-r3 fairings flex or bend when you press on them, this means the material does not fit the mounting points well. Misaligned brackets or holes can also make it hard to install the fairings. You may need to trim tabs, file holes, or even use heat to soften the plastic for a better fit. These issues can affect the look and safety of your yamaha.
Here are some common fitment problems seen on yzf-r3 motorcycles:
Gaps between fairings and the frame
Panels that do not align with the tank or seat
Clips or brackets that pop out during rides
Fairings that flex or move when touched
Difficulty installing LED blinkers or lights
Preventing Misalignment
You can prevent misalignment by checking every mounting point before you install new yzf-r3 fairings. Always make sure the fairings are made for your exact yamaha model year. Test-fit each panel before tightening any fasteners. Adjust the alignment by hand and use gentle pressure to seat the fairings. If you find a spot that does not fit, try using silicone or double-sided tape to hold it in place.
A good fit keeps your yzf-r3 looking sharp and helps the fairings last longer. You should also check the alignment of the LED lights and wiring. If you rush the installation, you might damage the fairings or the frame of your yamaha. Take your time and follow the instructions in your owner’s manual. This way, your yzf-r3 fairings will fit well and stay secure.
Aftermarket Motorcycle Fairings
Material Options
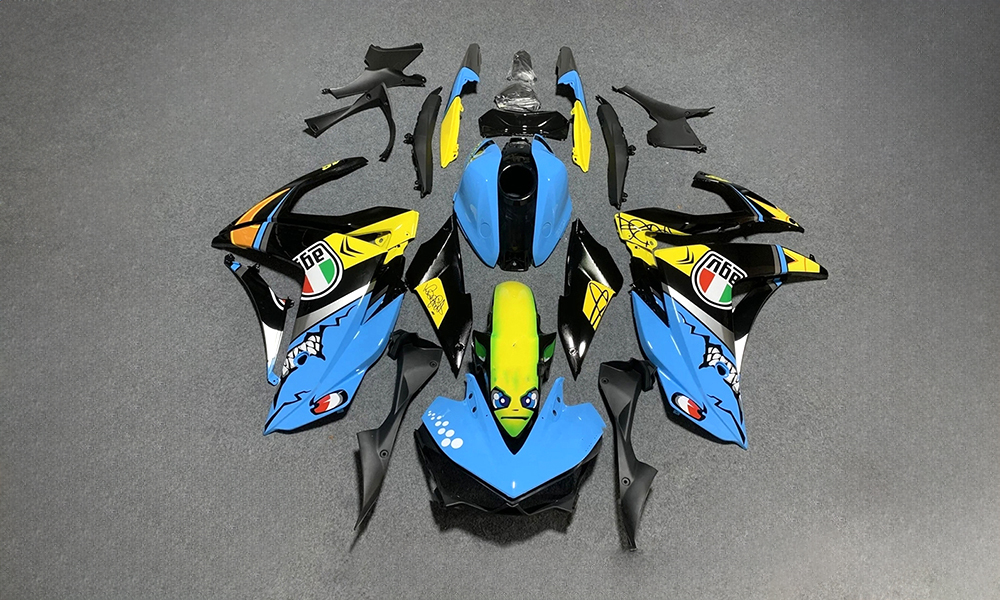
When you look for aftermarket motorcycle fairings, you will see many choices. Each material gives your motorcycle different good things. ABS plastic is a favorite because it is light and strong. Fiberglass can take hits well and is easy to fix. Carbon fiber is very strong and super light, so your motorcycle handles better. Some brands use bio-composites and recycled stuff now. These choices help the planet and follow new safety rules. You might also see fairings made with 3D printing, which cuts down on waste and lets you get custom looks.
Light materials help your motorcycle go faster and use less gas.
Aerodynamic fairings can help you handle better at high speeds.
Eco-friendly fairings are better for the earth and follow new laws.
Pre-Drilled vs. Custom Fit
There are two main types of aftermarket fairings: pre-drilled and custom fit. Pre-drilled fairings have holes already made for your motorcycle. This makes putting them on fast and simple. Custom fit fairings may need you to make holes or change the panels. These fairings can give your motorcycle a special look but take more time to put on. If you want an easy upgrade, pick pre-drilled fairings. If you want a cool style or have a special build, custom fit fairings might be better for you.
Tip: Always try your fairings on before you finish putting them on. This helps you avoid problems and saves time.
Quality Indicators
You can find good aftermarket motorcycle fairings by checking a few things. Look for smooth surfaces and even paint. Strong tabs and tough hardware mean good quality. The best fairings use better materials and have shapes that help with wind. These fairings last longer and protect your motorcycle more. Aftermarket fairings usually cost less than factory parts, from $300 to $700. Even though they cost less, many aftermarket fairings are stronger and look better than factory ones. Always read reviews and ask about the warranty before you buy.
OEM vs. Aftermarket R3 Fairings
Pros and Cons
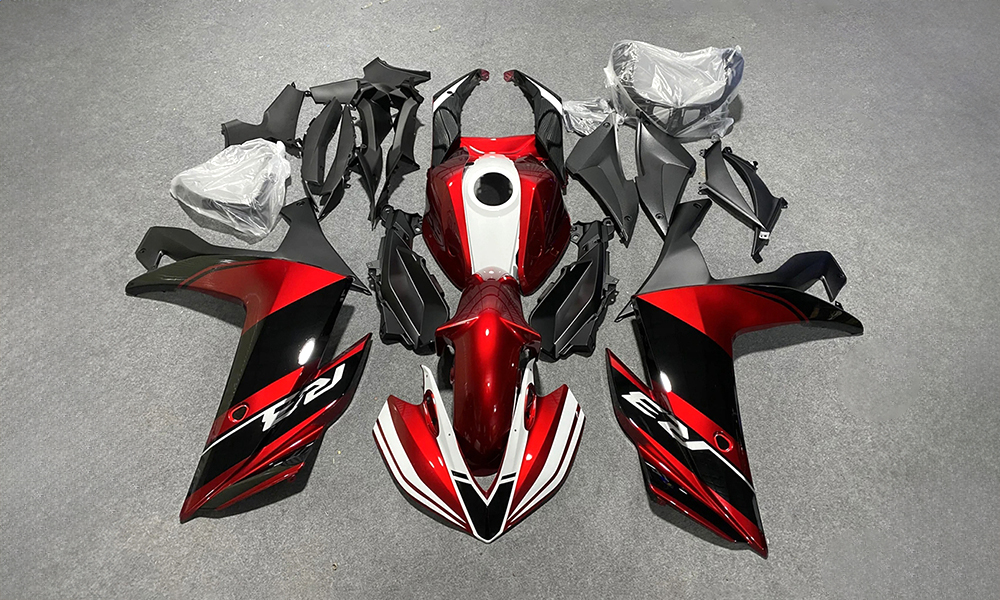
When you pick between oem fairings and aftermarket fairings, think about what is most important for your motorcycle. Many people like oem fairings because they fit just right and last a long time. These fairings come with a warranty, so you get help if something breaks. Oem fairings use strong materials and match your bike’s color and shape. Most shops can put them on without any trouble.
Aftermarket fairings give you more choices for color, design, and material. You can make your motorcycle look different or lighter with special fairings. These fairings usually cost less than oem fairings, which is good if you want to save money. But some aftermarket fairings do not fit as well. You might see spaces or need to move the panels around. Some people say third-party fairings break early, so check reviews before you buy.
Tip: If you want the best fit and fairings that last, oem fairings are the best choice. If you want to change how your r3 fairings look and spend less, aftermarket fairings give you more options.
Cost Comparison
You will see a big price difference between oem fairings and aftermarket fairings. The table below shows the usual price range for each type:
Fairing Type | Price Range (USD) | Material/Quality Notes |
|---|---|---|
OEM Fairings | $2,000 - $4,000 | Injection molded ABS, high quality, OEM fitment |
Aftermarket Fairings | $250 - $400 | Often PVC or compressed fairings, possible fitment issues |
Most oem fairings use strong ABS plastic and fit your motorcycle well. Aftermarket fairings can use different materials, like PVC or pressed plastic. Some aftermarket kits may not have all the bolts or the paint may not match your bike. Always ask about the material and what comes in the box before you buy new fairings.
Remember, both oem fairings and aftermarket fairings can use injection molding. Good aftermarket fairings can last a long time, but you need to check the details. If you want to avoid problems, look for fairings with good reviews and a clear warranty.
R3 Fairings Installation
Tools Needed
Before you start working on your yzf-r3 fairings, you need the right tools. Using the correct tools helps you avoid damage and makes the job easier. Here is a list of what you should have ready:
Four millimeter hex key – This tool removes the hex screws that hold the fairings.
Screwdriver – Use this to pry open clips and fasteners.
Pliers (optional) – These help you remove stubborn fasteners and clips.
Patience and caution – Take your time and handle each part carefully.
Tip: Keep your tools organized in a tray or box. This way, you do not lose any small parts during the process.
Removing Old Panels
You must remove the old yzf-r3 fairings before you can install new ones. Follow these steps to take off the panels safely:
Unscrew the side cover panels. Use a 4mm or 5/32" Allen wrench to remove two screws on each side. Detach the panels from the clips.
Remove three screws from the black lower side panel with the same Allen wrench. Release the front lower plastic tab. Slide the panel down and forward to take it off.
Take off the inner black plastic covers. Remove screws and plastic clips with a Phillips screwdriver and small tools. Pull the panel rearward to release the tabs.
Remove screws and clips from the three lower inside black cover panels. Support the panels as you work to avoid damage or stripped screws.
Release the lower half of the side fairings. Remove attachments near the seat and bolts near the gas tank.
Pull the lower half of the fairings away. Remove the lower middle inside black trim panel. Leave the side trim panels hanging if wiring is attached.
Unscrew the last top screw on the side fairings. Unclip from the upper fairing, slide forward, and disconnect the turn signal. You do not need to remove the 8mm nut.
Unclip and remove the lower inside left and right black panels from the wiring if needed.
When you reach the windscreen, use a Phillips screwdriver to remove the four plastic screws. Do not use a cordless drill because the plastic heads strip easily. Once the fairing is loose, pull it straight forward to detach it from the clips. Remove the rubber nuts holding the windscreen by hand. If the rubber nuts are stuck or damaged, replace them.
Note: Always support the panels with one hand while you remove screws. This prevents scratches and keeps your motorcycle looking new.
Installing New Fairings
Now you can install your new yzf-r3 fairings. The 2025 model uses a straightforward process, but you must check every step for a good fit. Start by lining up each panel with the correct mounting points on your yamaha. Insert the screws loosely at first. This lets you adjust the panels for perfect alignment.
Attach the lower side panels first. Slide them into place and secure the tabs.
Install the inner black covers next. Make sure the tabs snap into the slots.
Place the side fairings and connect the turn signals. Check that the wiring does not get pinched.
Tighten all screws once you confirm the panels fit well and sit flush against the frame.
If you use aftermarket yzf-r3 fairings, test-fit each piece before final installation. Some panels may need gentle pressure or slight adjustment. Do not force any part into place. If a panel does not fit, check for extra tabs or brackets on your yamaha motorcycle.
Tip: Use a small amount of silicone on stubborn tabs to help them slide into place. This also reduces rattling during rides.
Wiring and Clip-On Adjustments
Proper wiring and clip-on adjustments keep your yzf-r3 fairings working well. When you install the new panels, make sure all cables have enough slack. Avoid sharp bends or tight loops in the wiring. This prevents damage and helps your motorcycle last longer.
Route cables away from moving parts and pinch points.
Use service loops to give wires extra length for future repairs.
Clip excess wire tie ends to keep the area neat and prevent interference.
Support all cables with proper strain relief to avoid stress on connectors.
If your new yzf-r3 fairings have built-in LED lighting, check the wiring harness. Some older yamaha motorcycles may need an adapter or a new harness for the lights to work. Test all lights before you finish the installation. If you need to reposition the clip-ons for a better fit, loosen the bolts and adjust them slightly. Make sure the handlebars move freely and do not touch the fairings.
Remember: Careful wiring and correct clip-on placement help your yzf-r3 fairings last longer and keep your motorcycle safe.
YZF-R3 Maintenance Tips
Cleaning New Fairings
You want your yzf-r3 to look sharp and last a long time. Clean your new fairings with care. Use a soft microfiber cloth and mild soap mixed with water. Avoid harsh chemicals because they can damage the finish on your fairings. Rinse the panels with clean water and dry them right away to stop water spots. If you see bugs or tar, use a gentle cleaner made for motorcycles. Never use rough sponges or brushes. These can scratch the fairings and make them look dull.
Tip: Clean your yzf-r3 fairings after every ride in the rain or on dirty roads. This keeps your motorcycle looking new and helps you spot any damage early.
Inspecting Fasteners
Fasteners hold your yzf-r3 fairings tight to the frame. You should check them often to keep your motorcycle safe. Follow these steps for a good inspection:
Look at each fastener for rust or damage.
Use a torque wrench to make sure each screw is tight but not over-tightened.
Check that all clips and brackets hold the fairings in place.
Test the threads with a gauge to see if they fit right.
Measure the coating on screws to make sure it protects against rust.
If you find a loose or broken fastener, replace it right away.
Here is a table that shows common fastener inspection benchmarks for your yzf-r3:
Inspection Benchmark | Description | Standards/Criteria |
|---|---|---|
Tensile Test | Checks screw strength under pulling force | ASTM F606/F606M |
Torque Test | Makes sure screws are tight but not too tight | ISO 16047; 70%-80% of yield torque |
Hardness Testing | Tests how hard the screw is | Rockwell or microhardness testers |
Coating Thickness Measurement | Measures rust protection layer | Magnetic or eddy current methods |
Corrosion Resistance Test | Checks how well screws resist rust | ISO 9227; 48-72 hours for galvanized screws |
Thread Inspection | Makes sure threads fit right | ASME B1.2 or ASME B1.16M |
Always keep a record of your inspections. This helps you spot patterns and fix problems before they get worse.
Long-Term Care
Taking care of your yzf-r3 fairings helps them last for years. Store your motorcycle in a garage or use a cover to protect the fairings from sun and rain. Check the fasteners every month and after long rides. Wax the fairings twice a year to keep the color bright and protect the surface. If you see cracks or chips, fix them right away to stop bigger problems. Use only products made for motorcycle fairings. This keeps the panels strong and looking good.
Remember: Good care keeps your yzf-r3 fairings safe, shiny, and ready for every ride.
When you replace your 2025 R3 fairings, always check if the fairings match your motorcycle. Look at the new mounting points and LED lighting before you buy fairings. Pick fairings made from strong materials for better safety and style. Follow each step in the guide to install the fairings the right way. Read your owner’s manual and talk to trusted suppliers about fairings. Good fairings help your motorcycle last longer and look great on every ride.
FAQ
Can you use 2025 R3 fairings on older models?
You cannot use 2025 R3 fairings on older models without major changes. The mounting points and LED wiring do not match. Always check your model year before buying new fairings.
What should you do if the new fairings do not fit?
First, check each mounting point and bracket. Try to align the panels by hand. If you still see gaps or loose parts, contact the supplier. Do not force the panels into place.
Do you need special tools to install 2025 R3 fairings?
You only need basic tools like a hex key, screwdriver, and pliers. A torque wrench helps you tighten screws safely. Keep your tools organized for a smooth installation.
How do you keep your new fairings looking new?
Clean your fairings with a soft cloth and mild soap. Avoid harsh chemicals. Wax the panels twice a year. Store your motorcycle indoors or use a cover to protect the finish.
Will aftermarket fairings affect your motorcycle’s warranty?
Some aftermarket fairings can void your warranty if they cause damage. Always check your warranty terms. Ask your dealer before installing non-OEM parts.
See Also
How To Easily Replace Fairings On A 2019 BMW S1000RR
Five Professional Tips To Save Money On Fairing Replacements
Best Fairing Options For 2019-2023 Honda CBR650R Riders
Leading Five Aftermarket Motorcycle Fairing Brands To Watch In 2025
Essential Road Safety Advice For Riders Using Motorcycle Fairings
