A Complete Guide to Black Ninja 650R Fairing Upgrades in 2025

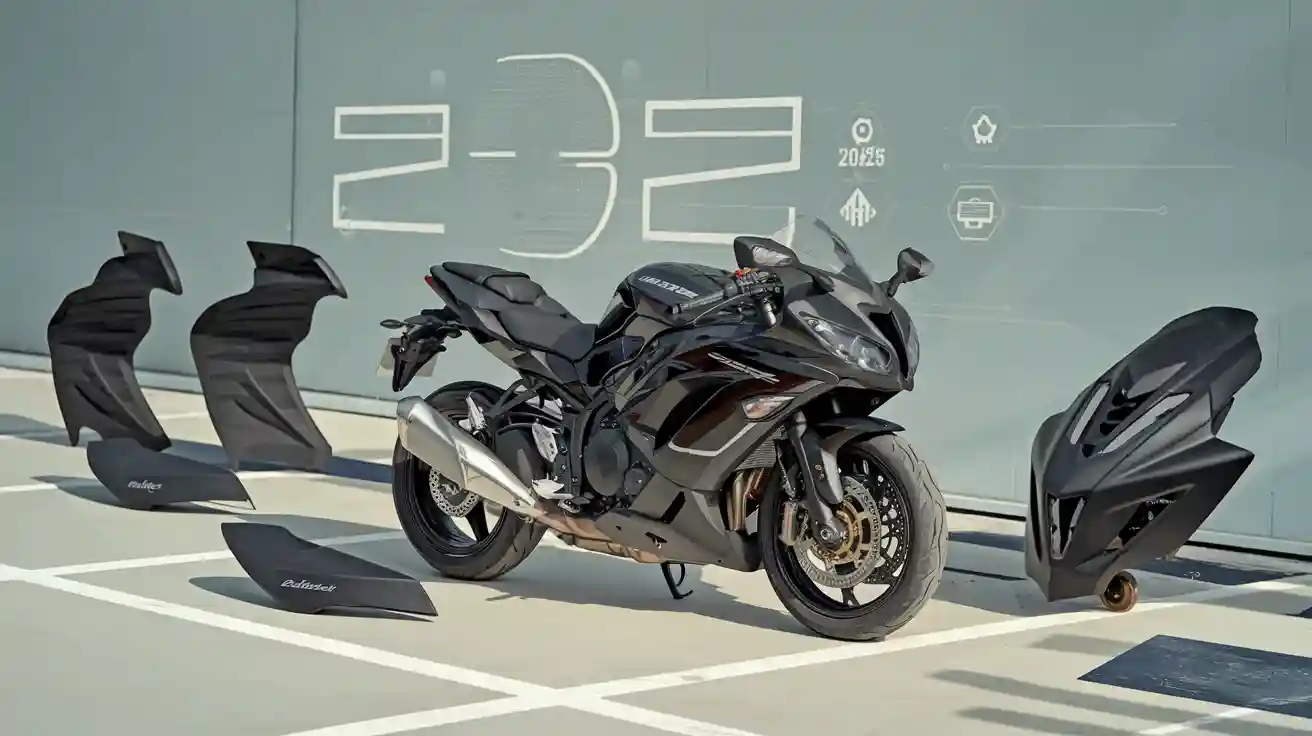
You want your black ninja 650r to turn heads in 2025. Upgrading with premium fairings gives your ride a fresh look and better protection. Start by picking high-quality parts that match your style. Install them with care for a perfect fit. You will notice the difference right away—your bike feels new, stands out, and holds its value.
Tip: Take photos before and after your upgrade to see the transformation.
Why Upgrade Black Ninja 650R Fairings
Benefits of Premium Fairings
You want your bike to look sharp and feel solid. Premium fairings do more than just change the style. They give you better protection and a smoother ride. Many Ninja 650R owners in 2025 upgrade their fairings for these reasons:
1. Cracks or breaks in old fairings make your bike less safe. 2. Faded or discolored panels take away from your bike’s cool look. 3. Loose or misaligned fairings can rattle and feel uncomfortable. 4. Damage from accidents weakens the fairing material. 5. You might want to boost your bike’s performance or refresh its style.
Tip: Upgrading your fairings can also help your bike cut through the wind better and feel lighter on the road.
Enhanced Aesthetics and Personalization
You can make your black ninja 650r stand out with the right upgrades. Many riders love adding custom parts like racing screens, fender extensions, and frame sliders. These not only look great but also protect your bike.
- Vinyl wraps are a top choice for changing up your bike’s look. You can pick from metallic, gloss, matte, or carbon fiber finishes. Each one gives a different vibe—metallic shines, gloss pops, matte looks smooth, and carbon fiber feels sporty.
- Aftermarket body kits and exhaust systems let you go beyond the factory style. Some riders even choose bold colors like white to make their bike unique.
Note: Vinyl wraps are easy to maintain and can protect your fairings from scratches.
Protection and Resale Value
Premium fairings do more than just look good. They shield your bike from road debris, weather, and small bumps. When your fairings stay in top shape, your bike keeps its value. If you ever want to sell your black ninja 650r, clean and stylish fairings will help you get a better price. Buyers notice when a bike looks well cared for.
Choosing Premium Fairings for Black Ninja 650R
Top Brands and Materials in 2025
When you start looking for premium fairings, you want the best brands and materials. MotoComposites stands out in 2025. They offer a wide range of carbon fiber parts for your Ninja 650R. Carbon fiber is strong and light, which makes your bike feel faster and more agile. You can find everything from front fenders to large side fairings made with 100% carbon fiber.
Here’s a quick look at some top options:
| Part Type | Material | Model Year Compatibility | Brand |
|---|---|---|---|
| Front Fender | 100% Carbon Fiber (Glossy Twill/Plain Weave) | 2017-2024 | MotoComposites |
| Rear Hugger | 100% Carbon Fiber | 2017-2024, Z650RS | MotoComposites |
| Fork Covers | 100% Carbon Fiber | 2012-2016 | MotoComposites |
| Upper Cowling | 100% Carbon Fiber | 2012-2016 | MotoComposites |
| Instrument Cover | 100% Carbon Fiber | 2012-2016 | MotoComposites |
| Large Side Fairings | 100% Carbon Fiber | 2012-2016 | MotoComposites |
You have more choices than just carbon fiber. Here are the most popular materials for Ninja 650R fairings in 2025:
- ABS plastic gives you great impact resistance and keeps your bike light. Riders like it for both street and racing.
- Fiberglass is tough and easy to fix. If you want to try custom designs, fiberglass works well.
- Carbon fiber offers the best mix of strength and lightness. It costs more, but it’s perfect if you want high performance.
Tip: Carbon fiber fairings look amazing and last a long time, but ABS plastic is a smart pick if you want something affordable and easy to replace.
Color and Finish Options for Black Ninja 650R
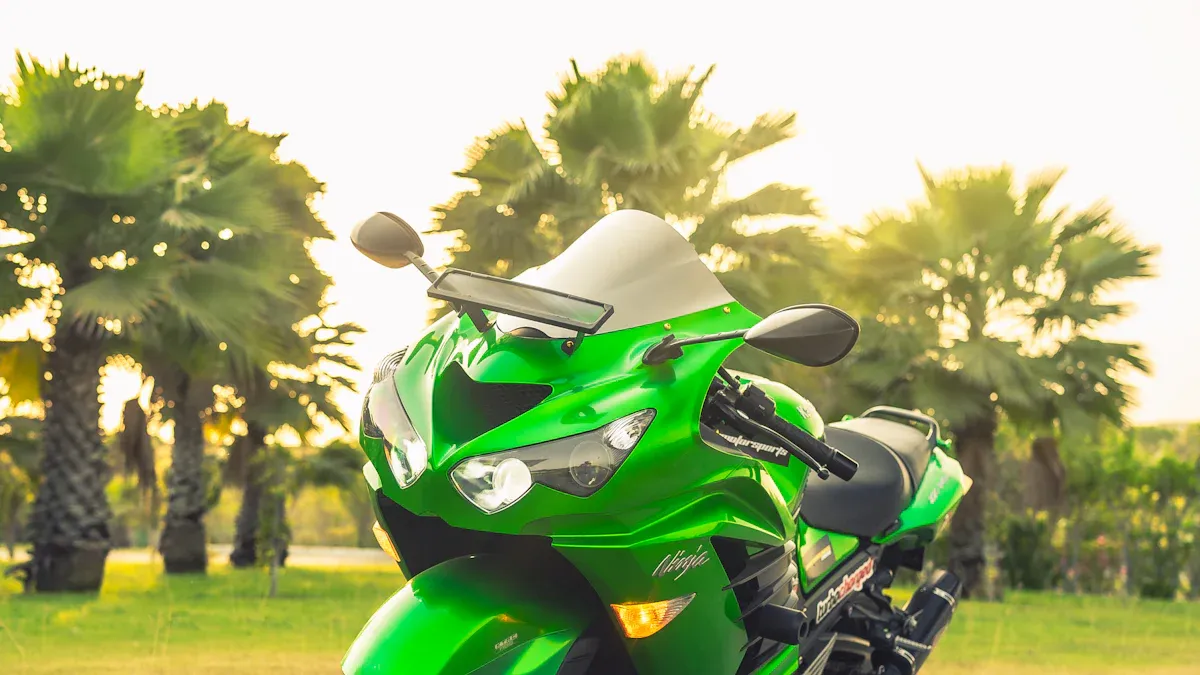
You can make your bike look exactly how you want. In 2025, major brands offer many color and finish options for the Ninja 650R. If you want to keep the classic look, you can choose standard black. For something unique, try a matte black with a white cherry blossom split design. Some brands use a 7-stage professional paint process, so your fairings look deep and glossy.
Here’s a table to help you see what’s out there:
| Feature | Details |
|---|---|
| Color Options | Matte Black with White Cherry Blossom Split, Standard Black |
| Paint Finish | 7-stage professional paint process, 7-step professional paint job |
| Material | OEM grade ABS plastic |
| Additional Finish | Premium clear coat with UV protection (optional) |
| Customization | Unique designs, color changes, logo modifications available |
| Accessories | Tank cover, universal black bolt kit, clear or black windscreen |
| Fitment | Injection molded for perfect OEM fit, pre-drilled bolt holes |
You can also ask for custom colors or even add your own logo. Some brands let you pick a clear or black windscreen. Accessories like tank covers and bolt kits help you finish the look.
Note: A premium clear coat with UV protection keeps your fairings looking new, even after long rides in the sun.
Compatibility Checklist for 2016 Models
Before you buy new fairings, you need to check if they fit your 2016 Ninja 650R. Kawasaki changed the design several times over the years. The 2016 model belongs to a group that got a big update in 2012. Fairings from 2012-2016 usually fit each other, but older or newer parts might not line up.
Here’s what you should check:
- Fairings from 2006-2008 (first generation) do not fit 2009-2011 (second generation) bikes without a lot of work.
- The mounting holes and fasteners changed between generations. Sometimes, you need to drill or trim the fairings to make them fit.
- The left side bottom fairing can hit the brake pedal on some models. You may need to cut it for a proper fit.
- Belly fairing halves might not line up and could need trimming.
- Some newer fairings need longer screws than the originals.
- Changes in coolant reservoir size and extra lights can affect how the fairings fit.
Tip: Always double-check the year and trim of your bike before you order. If you have a 2016 black ninja 650r, look for fairings made for 2012-2016 models. This saves you time and avoids extra work.
Preparing Your Black Ninja 650R for Installation
Tools and Workspace Setup
Before you start, set up your workspace for safety and efficiency. Pick a spot that is clean, flat, and free of clutter. Good lighting helps you see every detail, so turn on extra lights if you need them. Gather all your tools before you begin. This keeps you from running around looking for a missing screwdriver.
Here’s a quick checklist to help you get ready:
- Clear the area around your bike. Remove anything you might trip over.
- Put on safety gear like gloves, eye protection, and sturdy shoes.
- Lay out your tools. You will need screwdrivers, Allen wrenches, a socket set, and a soft cloth.
- Keep a small container for screws and bolts. This stops them from rolling away.
- If you use a lifting table, make sure it is stable and the safety locks work.
- Read your service manual. It shows you where each fastener goes and helps you avoid mistakes.
Tip: A well-lit and organized workspace makes the job faster and safer. You will also feel less stressed if everything is in its place.
Removing Old Fairings Safely
Taking off the old fairings can feel tricky, but you can do it with patience. Start with the black side panels. These usually come off first and give you access to other parts. Use the right screwdriver or wrench for each bolt. If you force a tool, you might strip the screw or crack the plastic.
Some parts, like the fuel tank, may need to be loosened so you can reach hidden bolts. Let the tank hinge back gently. This gives you space to get to the ECU or other components underneath. If you get stuck, check your service manual or look up a video for your bike’s model year. Even videos for earlier models can help.
- Keep track of each screw and clip. Put them in your container as soon as you remove them.
- Work slowly. If a panel feels stuck, double-check for hidden fasteners.
- For some jobs, you may not need to remove every fairing. Save time by only taking off what you need.
Note: If you feel unsure, it’s okay to ask a pro for help. Rushing or guessing can lead to broken parts or lost hardware.
Installing Premium Fairings on Black Ninja 650R
Fitting and Aligning New Fairings
Getting your new fairings to fit just right makes your bike look sharp and helps everything stay secure. You want to take your time and follow each step. Here’s a simple way to make sure you fit and align your fairings the right way:
- Set up your workspace. Make sure it’s clean, bright, and you have all your tools ready.
- Start by removing the lower fairings. This helps you see how the panels come off and makes the rest easier.
- Take off the windscreen bolts and remove the windscreen.
- Find and remove the plastic locking pins (these are the rivets) that hold the meter cowling. Then, take off the meter cowling.
- Remove the rivets and bolts that hold the inner cowlings on both sides.
- Carefully disconnect any electrical parts, like the headlights and turn signals. Look for locking connectors and unplug them gently.
- Remove the bolts that hold the left and right center cowlings and upper fairings to the frame.
- Take off the center cowlings on both sides.
- Look for hidden socket bolts behind the center cowlings and remove them.
- Disconnect the meter by taking off the rubber boot and unplugging the connectors.
- Gently pull the fairing tabs out of the rubber frame grommets. Don’t force them or you might break something.
- Remove the bolts that attach the meter bracket to the main cowling bracket. The fairings can get heavy, so be careful.
- Pull the upper fairing assembly forward to clear the bike. You might want a friend to help or use something soft to protect the paint.
When you put the new fairings on, just reverse these steps. Make sure every tab, bolt, and connector lines up before you tighten anything. If something doesn’t fit, check for hidden bolts or wires in the way.
Tip: Take your time with each step. Rushing can lead to scratches or broken tabs.
Securing and Testing for Fitment
Once you have the new fairings in place, you need to make sure everything is tight and lines up. Start by loosely fitting all the bolts and tabs. This lets you adjust the panels so they sit flush against the frame. When everything looks good, tighten the bolts in a crisscross pattern. This helps spread the pressure evenly and keeps the fairings from warping.
Check all the electrical connections. Plug in the headlights, turn signals, and running lights. Test them before you finish up. If something doesn’t work, double-check the connectors.
Here’s a quick checklist for testing fitment:
- Look for even gaps between panels.
- Make sure all tabs are in their rubber grommets.
- Check that the windscreen sits flat and doesn’t wobble.
- Press gently on each panel to see if it moves or rattles.
- Turn the handlebars fully left and right to make sure nothing rubs or catches.
Note: If you hear rattling or see uneven gaps, loosen the bolts and adjust the panels. Sometimes a small shift makes a big difference.
Common Mistakes to Avoid
You want your black ninja 650r to look its best, so watch out for these common mistakes:
- Overtightening bolts. This can crack the fairings or strip the threads.
- Forgetting to reconnect electrical plugs. Always double-check your lights and signals before you ride.
- Forcing tabs or panels. If something feels stuck, look for hidden fasteners or wires.
- Mixing up screws and bolts. Keep them organized in a tray or cup.
- Skipping the test fit. Always check the alignment before tightening everything down.
Callout: If you ever feel unsure, ask a friend for help or check a video guide. Taking it slow saves you time and money in the long run.
Customizing and Maintaining Black Ninja 650R Fairings
Decals, Paint, and Accessories
You can make your bike look unique with the right decals, paint, and accessories. In 2025, you have more choices than ever for your fairings. Many riders love using a 7-stage professional paint process. This gives your fairings a deep, shiny finish that lasts. You can pick from styles like gloss carbon fiber, matte metallic, or even iridescent colors. Want something bold? Try a gloss white cherry blossom or a matte black and blue combo. These trends help your bike stand out.
Here’s a quick table to show what’s available:
| Category | Details |
|---|---|
| Material | OEM Grade ABS Plastic |
| Paint Styles | Gloss Carbon Fiber, Matte Metallic, Iridescent, Gloss White Cherry Blossom |
| Decal Options | Custom colors, logo changes, year updates, combo kits |
| Accessories | Universal bolt kits, heat shields, seat cowl, windshield |
| Extra Protection | Premium clear coat with UV protection |
You can also add decals for a personal touch. Some riders remove logos, while others add new ones or change the color scheme. Accessories like a seat cowl or a new windshield give your black ninja 650r a fresh look and extra comfort.
Tip: Use a premium clear coat with UV protection to keep your paint looking new.
Maintenance for Longevity
Keeping your fairings in top shape is easy if you follow a few simple steps. First, park your bike in the shade or indoors to avoid sun damage. Sunlight can fade the paint over time. If you park outside, use a motorcycle cover with UV protection.
Wash your fairings with mild soap and a soft cloth. Avoid harsh chemicals or rough sponges. After washing, dry the panels and apply a motorcycle-safe wax. This keeps the finish glossy and protects against dirt and water.
Here’s a simple routine to follow:
- Park in shaded areas or use a UV-protective cover.
- Wash your bike every week or after riding in harsh conditions.
- Use gentle soap and soft cloths for cleaning.
- Apply wax or polish after each wash.
- Check for chips or cracks after long rides.
Regular care helps your fairings stay bright and strong. You will notice your bike always looks ready for the road.
Cost and Where to Buy Black Ninja 650R Fairings in 2025
Price Ranges for Premium Fairings
You probably noticed that prices for Ninja 650R fairings have gone up in 2025. If you want to upgrade your bike, it helps to know what to expect. Here’s a quick look at how much you might pay for different parts this year compared to before:
| Fairing Part | Price in 2025 (USD) | Previous Price (USD) |
|---|---|---|
| Front Fender | 229.99 | 194.99 |
| Rear Hugger | 199.99 | 169.99 |
| Fork Covers | 189.99 | 159.99 |
| Sprocket Cover | 144.99 | 119.99 |
| Front Fairing Base | 139.99 | 114.99 |
| Front Fairing | 444.99 | 374.99 |
| Tank Cover | 164.99 | 139.99 |
| Under Seat Covers | 164.99 | 139.99 |
| Upper Side Panels | 199.99 | 169.99 |
| Under Tank Panels | 269.99 | 229.99 |
| Large Side Panels | 474.99 | 399.99 |
| Radiator Covers | 389.99 | 329.99 |
| Inner Front Fairing | 384.99 | 324.99 |
| Instrument Cover | 89.99 | 74.99 |
| Matte-Plain Tank Cover | 244.99 | 163.99 |
| Cowling Inner Panels | 444.99 | 374.99 |
| Upper Cowling | 164.99 | 139.99 |
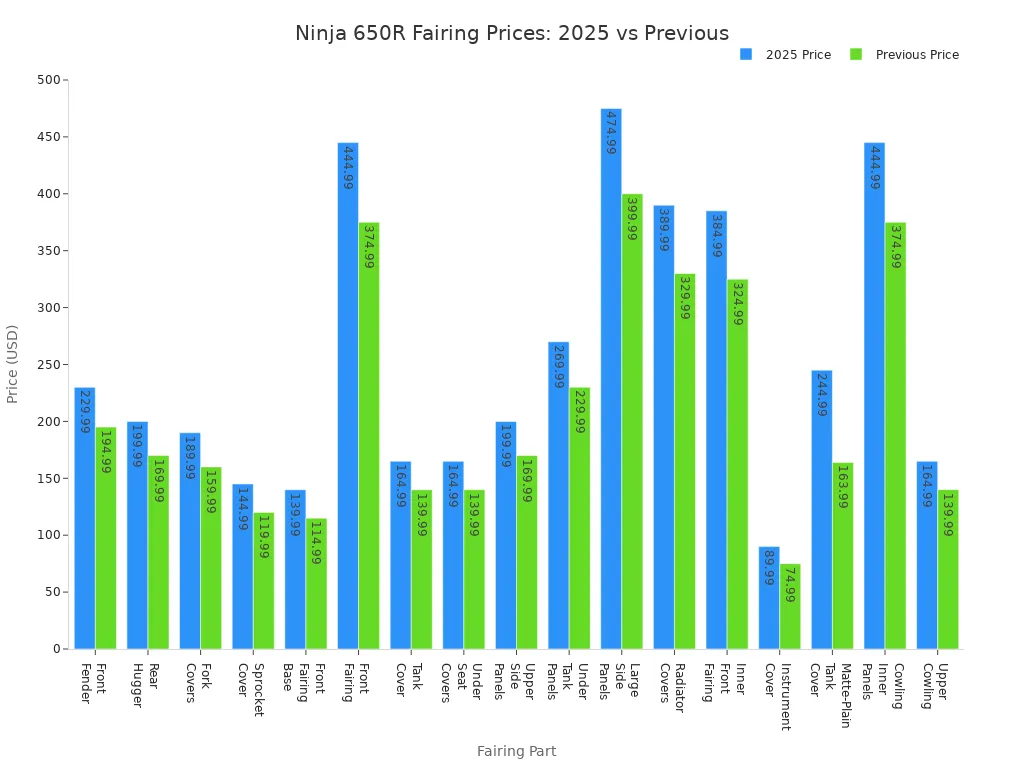
You can see that most parts cost more now. The front fairing and large side panels are some of the most expensive. Smaller pieces like the instrument cover cost less. If you want a full set for your black ninja 650r, plan your budget. Prices reflect better materials and new designs, but you still get great value for your money.
Tip: Shop around and compare prices before you buy. Sometimes you can find deals or bundles that save you cash.
Recommended Retailers and Online Sources
Picking the right place to buy your fairings matters just as much as the parts themselves. You want your new fairings to fit well and last a long time. Here are some things to look for when choosing a retailer:
- Quality craftsmanship means your fairings will fit perfectly and perform well.
- Customization options let you pick colors and graphics that match your style.
- Competitive pricing helps you get the best deal without losing quality.
- Worldwide shipping makes it easy to order from anywhere.
- Reliable and reputable sellers protect you from knock-offs and poor fit.
- Durable materials like ABS plastic or fiberglass keep your fairings strong and light.
- Aerodynamic shapes can boost your bike’s performance.
- Good fairings protect your bike from debris and weather.
- Style and function should work together for the best results.
You can find trusted fairing kits for the Ninja 650R at places like MotoComposites, eBay Motors, and RevZilla. Many riders also check out specialty motorcycle shops online. Always read reviews and check return policies before you buy.
Note: Take your time to find a fairing kit that balances value, style, and practicality. The right choice will keep your bike looking sharp for years.
Upgrading your black ninja 650r with premium fairings gives you a fresh look, better protection, and more value. Check out the big improvements riders notice:
| Improvement Area | What You Get |
|---|---|
| Style | Gloss carbon fiber, custom decals, and long-lasting paint |
| Protection | Strong ABS plastic, shields from debris and rain, perfect fit |
| Value | Higher resale price, better aerodynamics, unique appeal |
- You get to show off your style.
- Your bike stays safe from the weather.
- You boost your bike’s value.
Ready to make your black ninja 650r stand out? Start your upgrade today!
FAQ
How long does it take to install new fairings on my Ninja 650R?
Most riders finish the job in 2 to 4 hours. If you work slowly and stay organized, you can avoid mistakes. Take breaks if you need them. You will enjoy the process more.
Can I install fairings myself, or do I need a mechanic?
You can do it yourself with basic tools and patience. Many riders find it fun and rewarding. If you get stuck, check a video guide or ask a friend for help.
Will new fairings affect my bike’s performance?
Premium fairings can make your bike lighter and more aerodynamic. You might notice smoother rides and better wind protection. Choose quality parts for the best results.
How do I keep my fairings looking new?
Wash your bike with mild soap and a soft cloth. Park in the shade or use a cover. Wax the fairings after cleaning. Check for chips or cracks often.
See Also
Best Ninja 400 Fairing Styles To Watch In 2025
Ultimate Guide To Aftermarket Fairings For Ninja 400
Comprehensive Analysis Of Ninja 650 Fairing Performance
